First-Time DIY Tiling 101 | Step by Step to Installing Tile
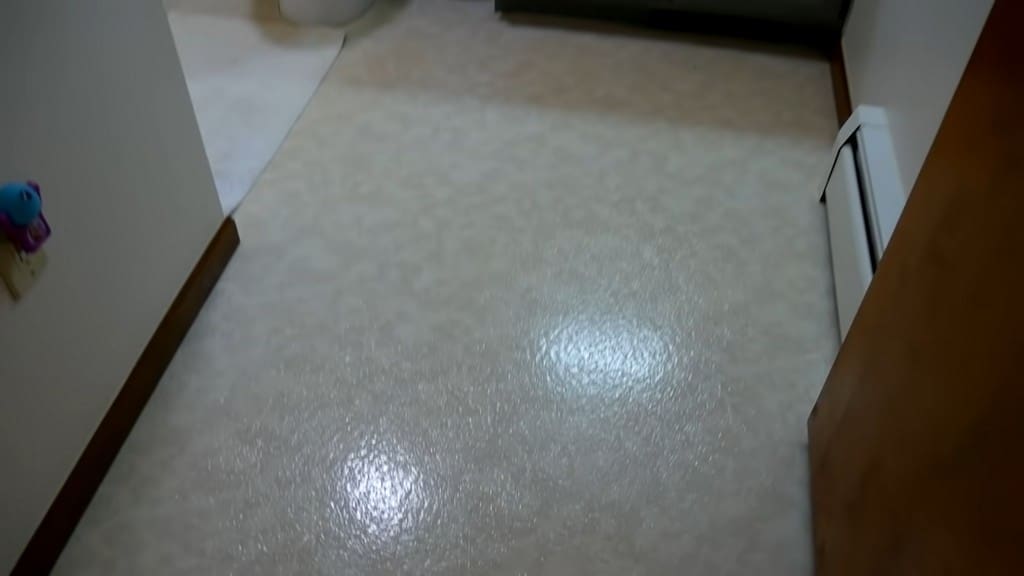
In addition to some other projects (such as a shower/tub and DIY shelf), we replaced this bathroom’s one-sheet linoleum flooring with some fantastic DIY tiling.
Follow my step-by-step guide to tiling on your own!
Prep Work
If you need to demo anything in the room before installation, start by removing the trim. Ensure you cut down into the trim and against the wall to avoid ripping up any wallpaper.
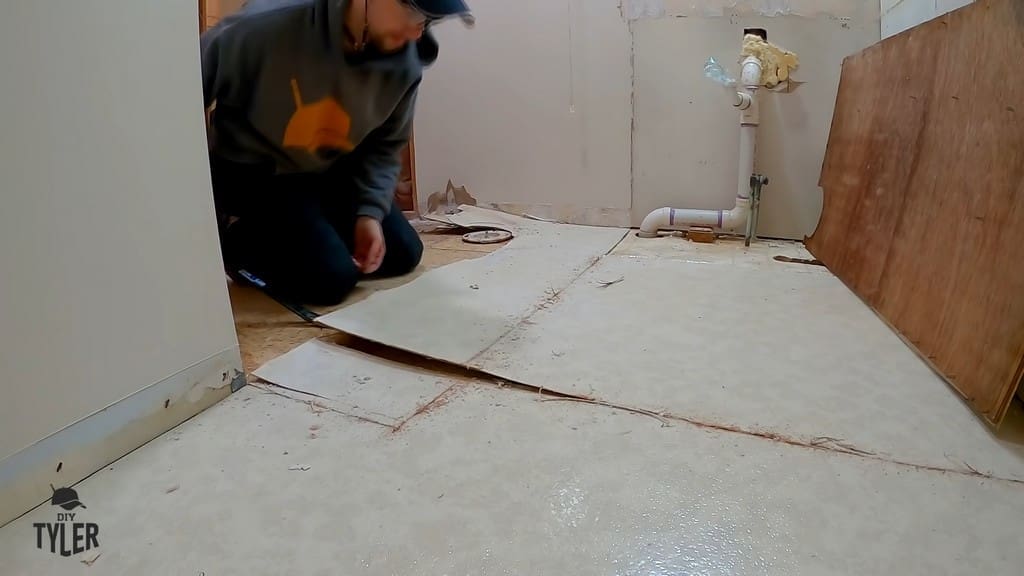
Next, you’ll want to take out the old flooring. I used an oscillating tool and a crowbar to tear up the old linoleum. The flooring was attached to a piece of quarter-inch plywood, so I was able to remove it fairly easily.
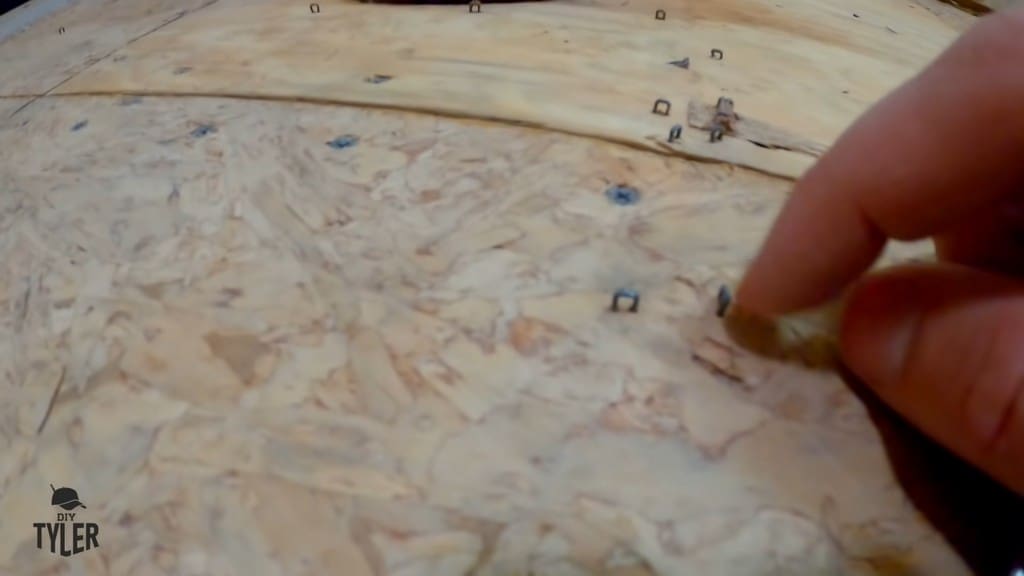
With all of the old linoleum removed, I used a straight-edge tool to check for any nails or staples poking up out of the plywood. Then, I knocked any I found down into the wood with a hammer.
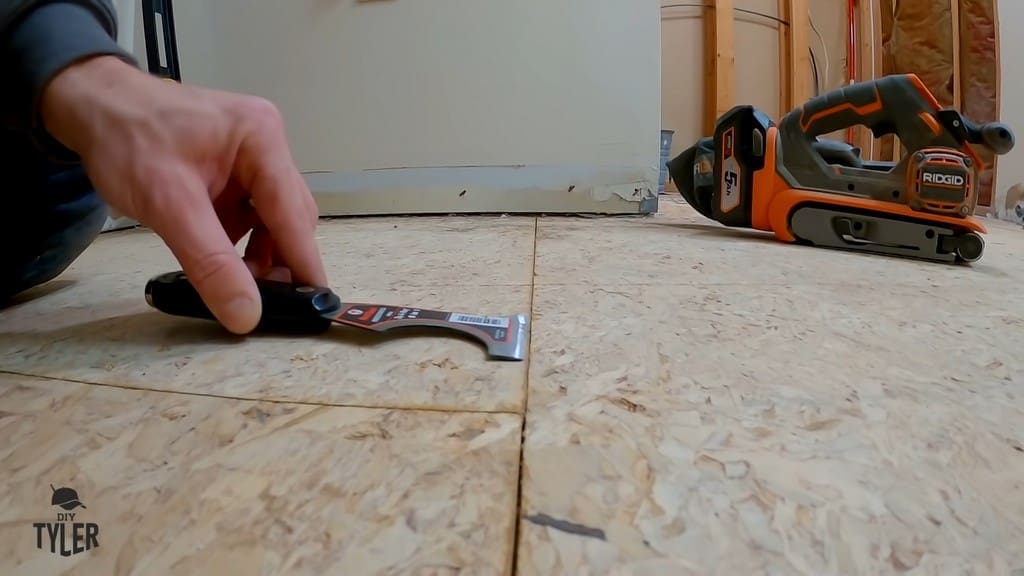
Next, I used the straight-edge tool to check the seams of the plywood for any ridges. If you find any ridges, you’ll need to sand them down with a belt sander.
Install the Underlayment
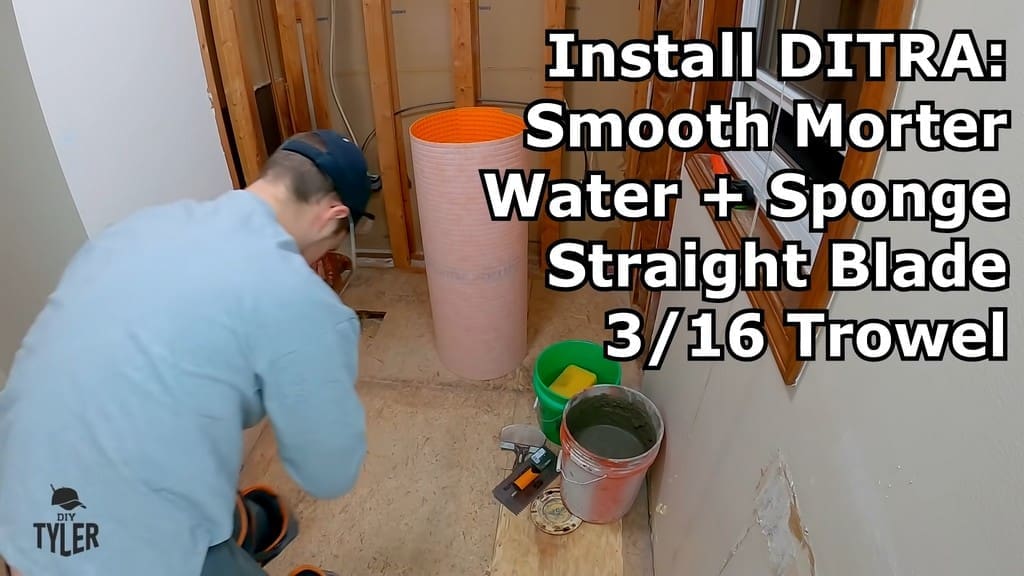
At this point, you need to install the underlayment that will go beneath the DIY tiling. I would not recommend going straight to your OSB flooring, as some DIY people suggest.
Skipping the underlayment decreases the overall lifespan of your tile.
Make sure your plywood is nice and clean by scrubbing it with a sponge. By wiping down the plywood, you’ll ensure that the underside of your mortar doesn’t dry out faster than the top side. If this were to happen, it would prevent good adhesion.
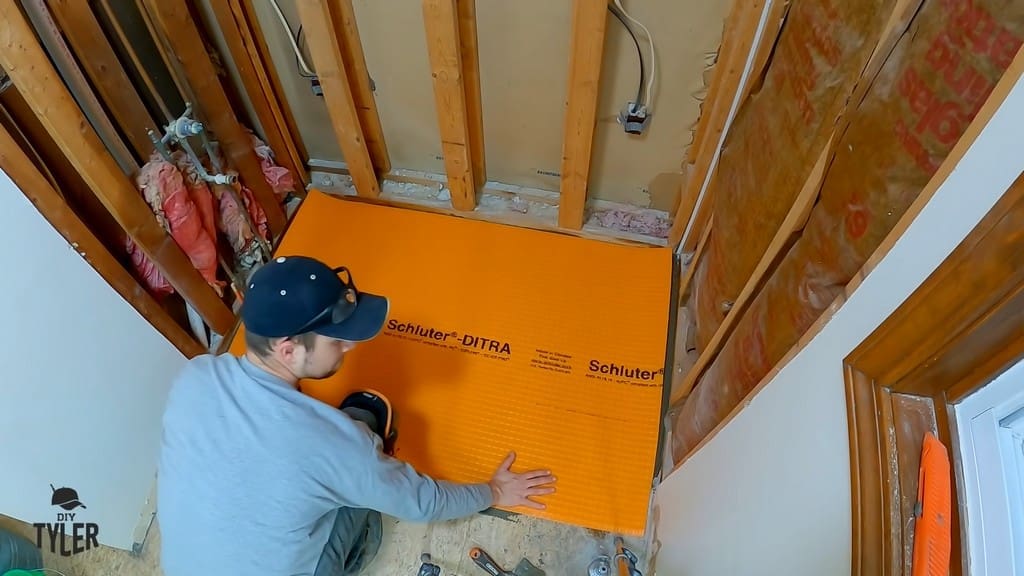
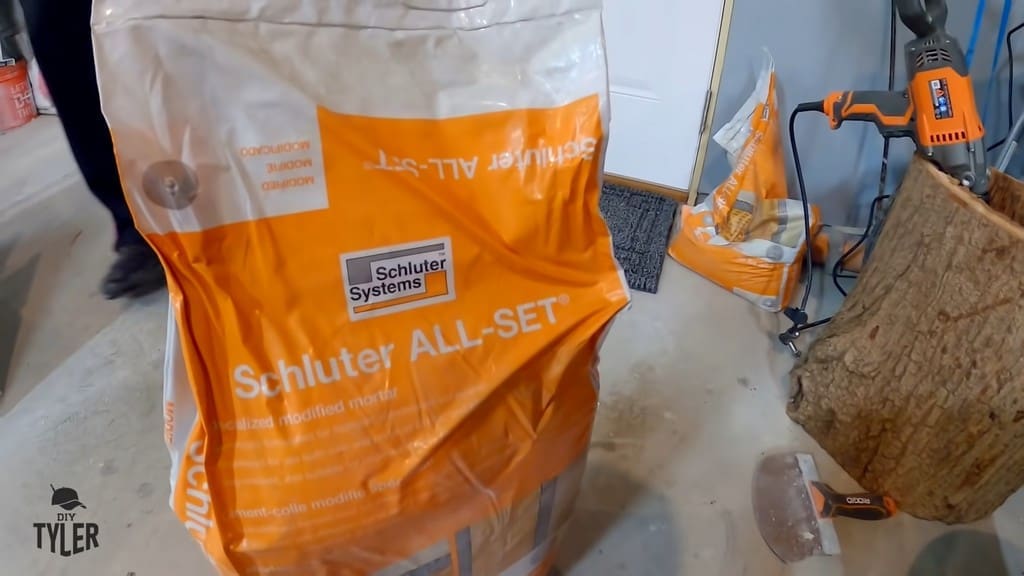
Be sure to check the manual for whatever DITRA-type product you are using. In my case, I was instructed to spread my ALL-SET with a 3/16ths notch trowel.
Pro tip: when laying out our Schluter DITRA underlayment, pull at a corner to make sure you have good adhesion.
I prefer DITRA over concrete board because it is so light and easy to cut, plus it doesn’t leave any dust. In addition, it is waterproof.
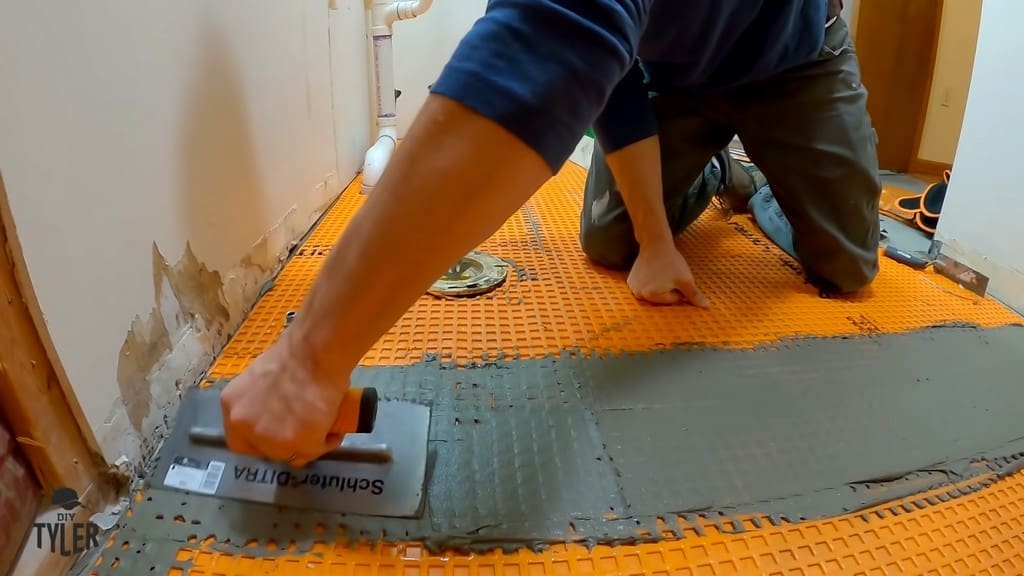
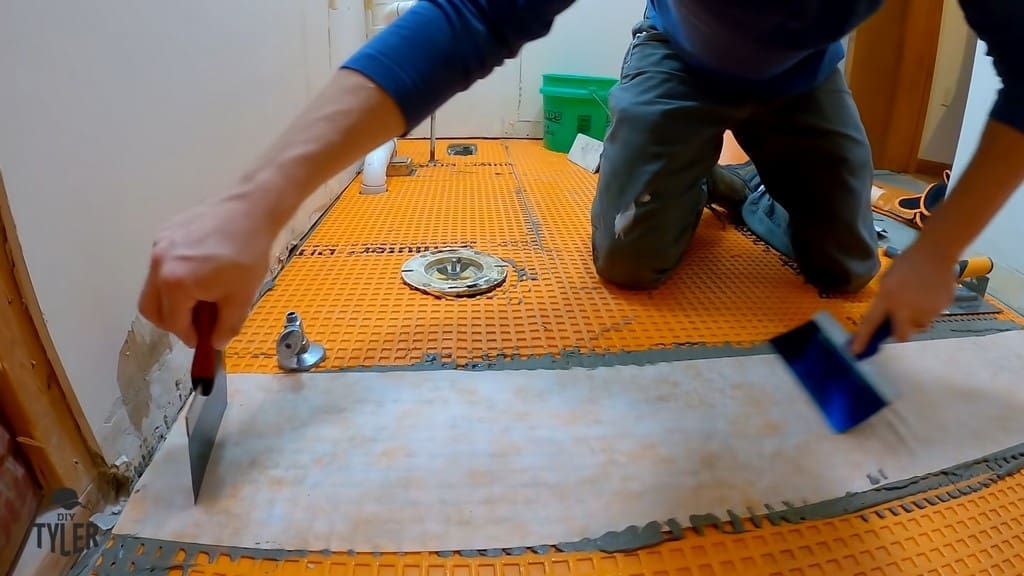
To complete this waterproofing all along the floor, you need to add KERDI wrap over the seams. I laid down a thin layer of mortar, followed by the KERDI wrap over top.
Next, I used two straight blades to squish the wrap into place and remove all the mortar out from underneath.
I did the same thing going up the wall.
Finally, with the mortar well and truly dried, I had to clean up any debris. This required going over the floor with a shop vac.
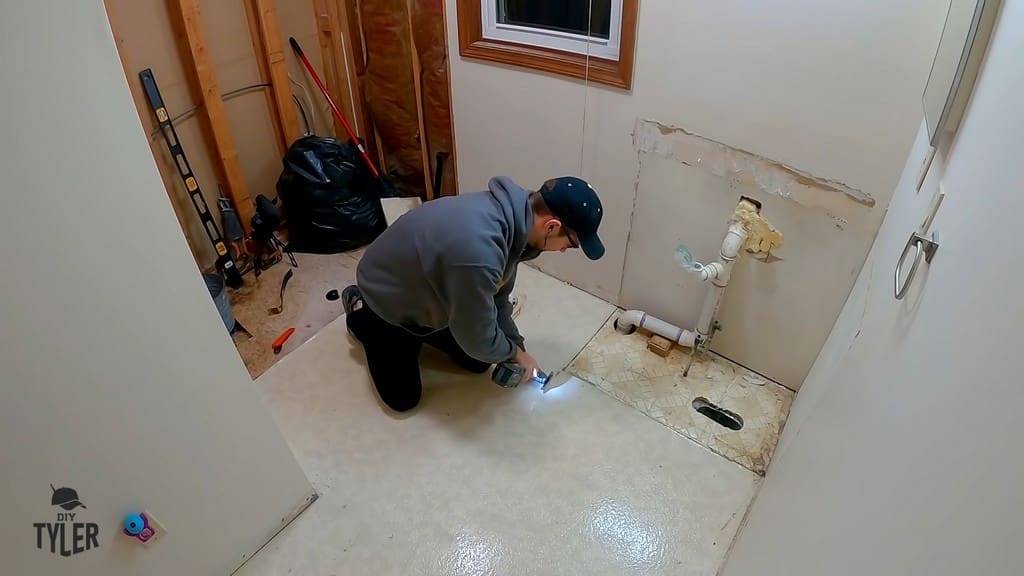
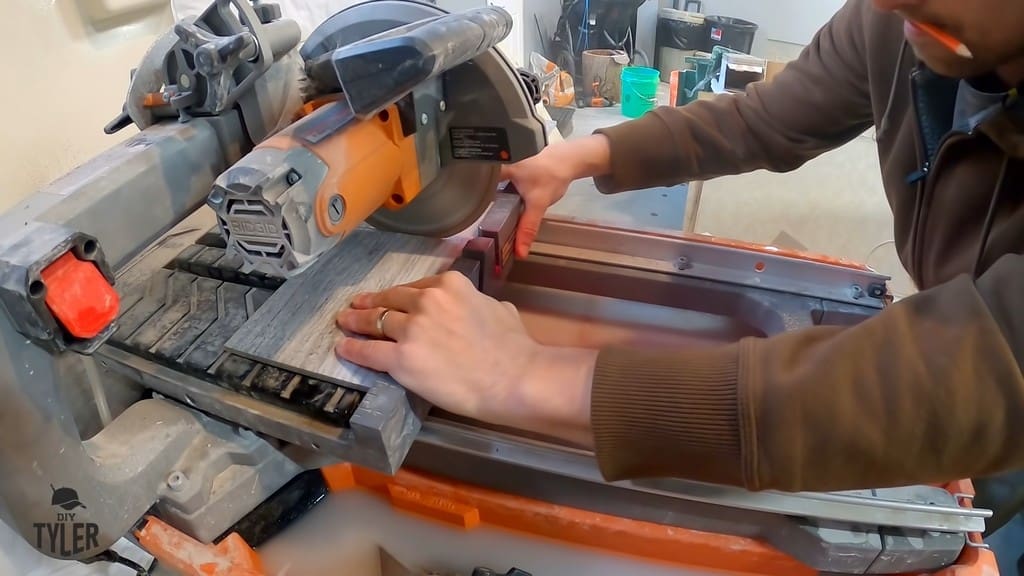
Preparing the Tile Offset and Cutting Holes
When it came to laying the tile itself, I chose to go with a 33% offset. That meant cutting a third off of multiple tiles.
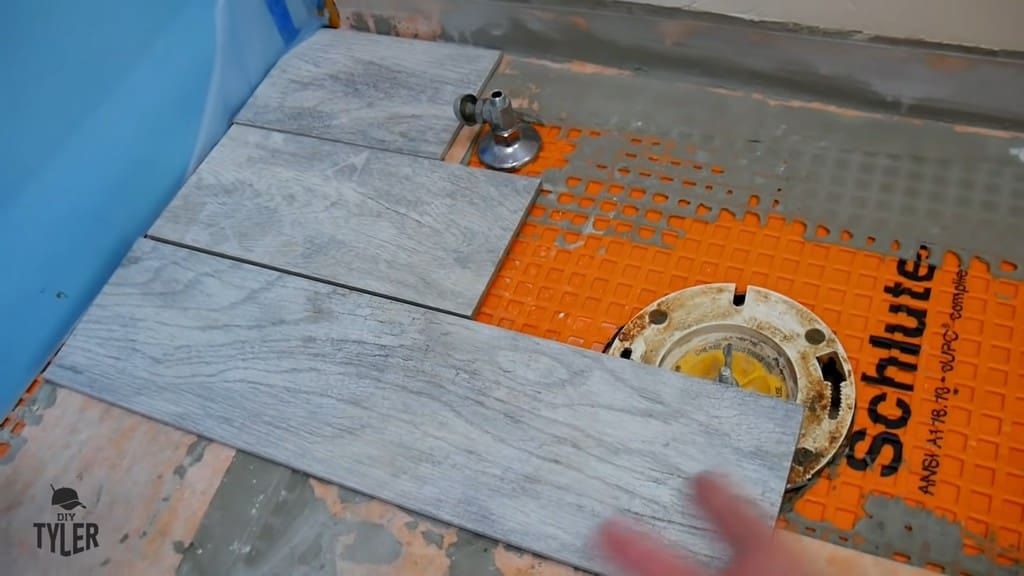
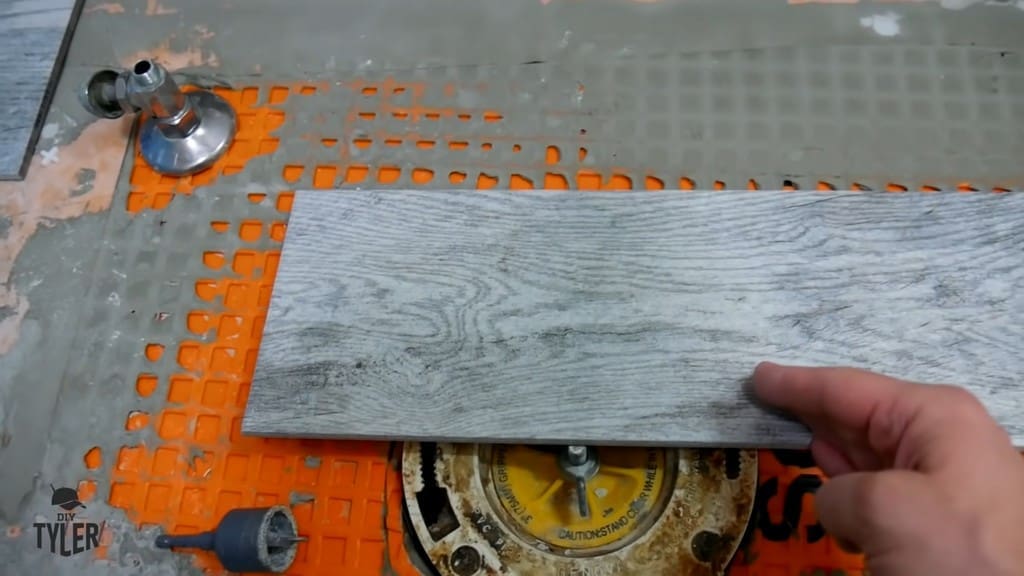
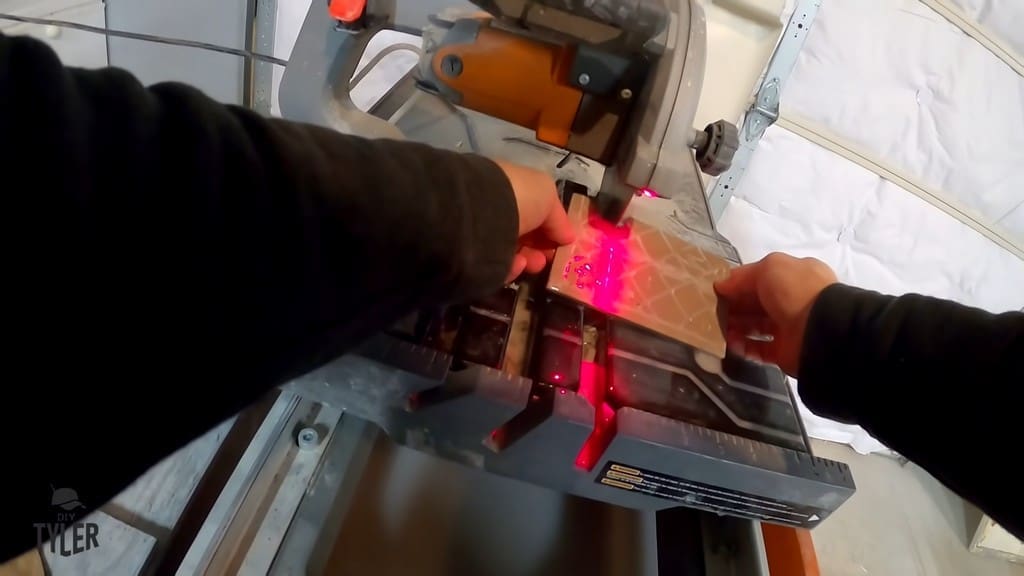
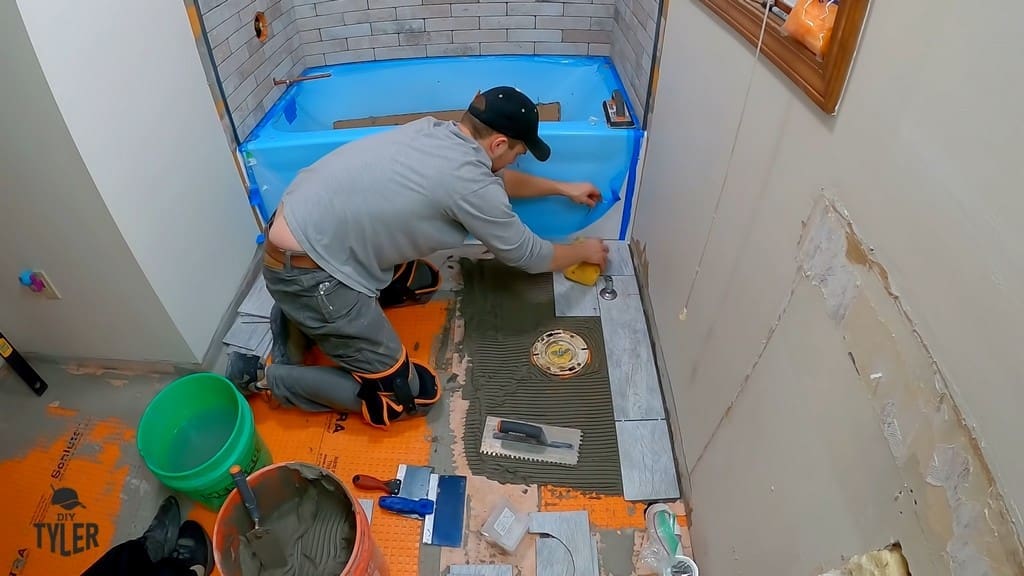
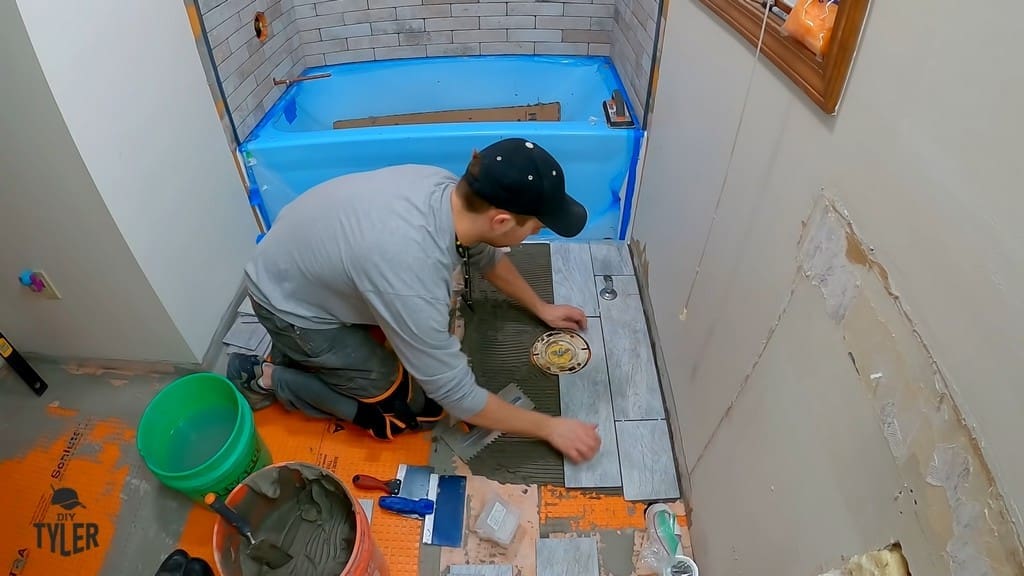
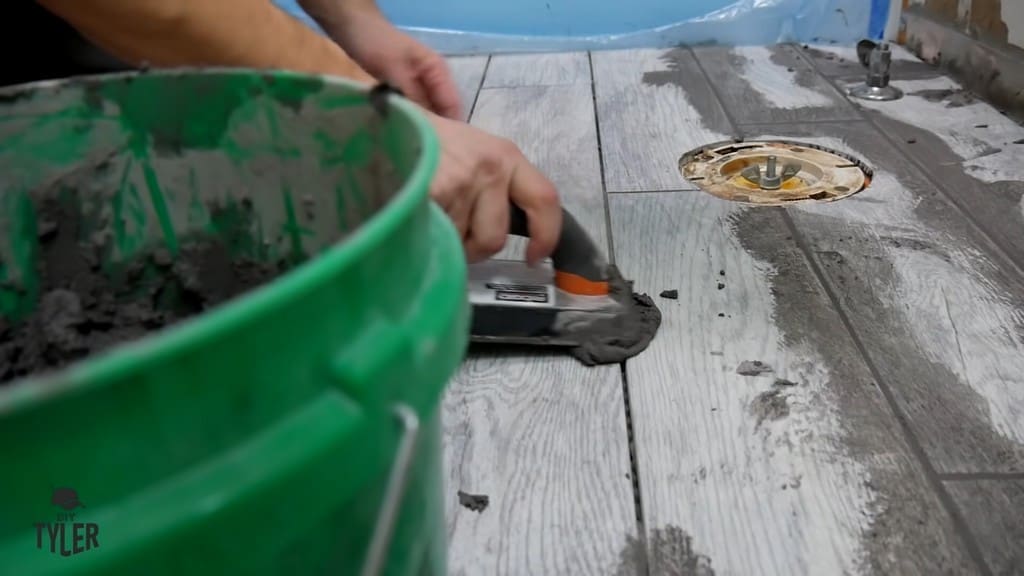
I had a couple of round holes that I needed to cut out around. The first cut had to be made into the first full tile in the top row. For that, I planned to use a round carbide-tipped tile cutter.
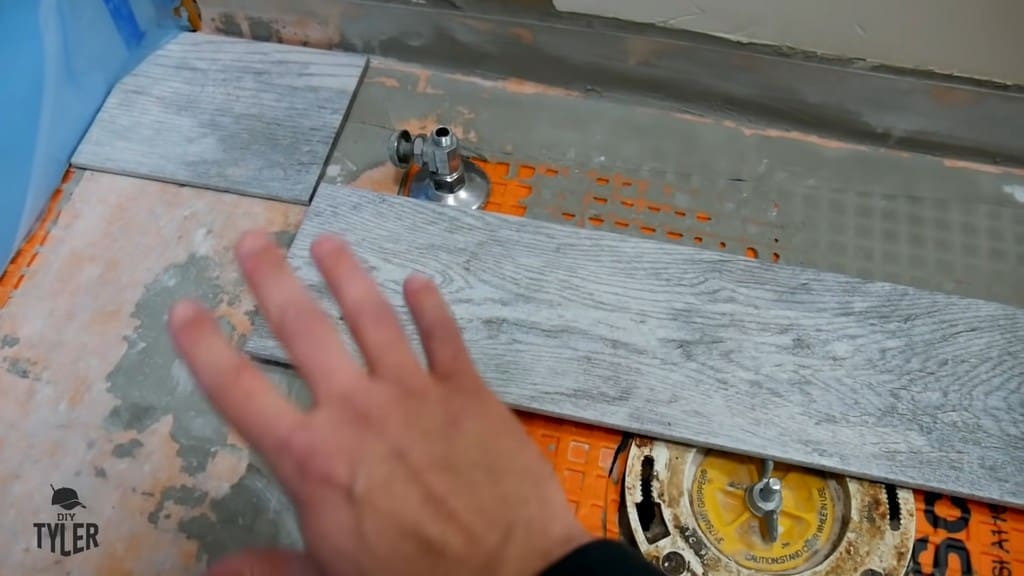
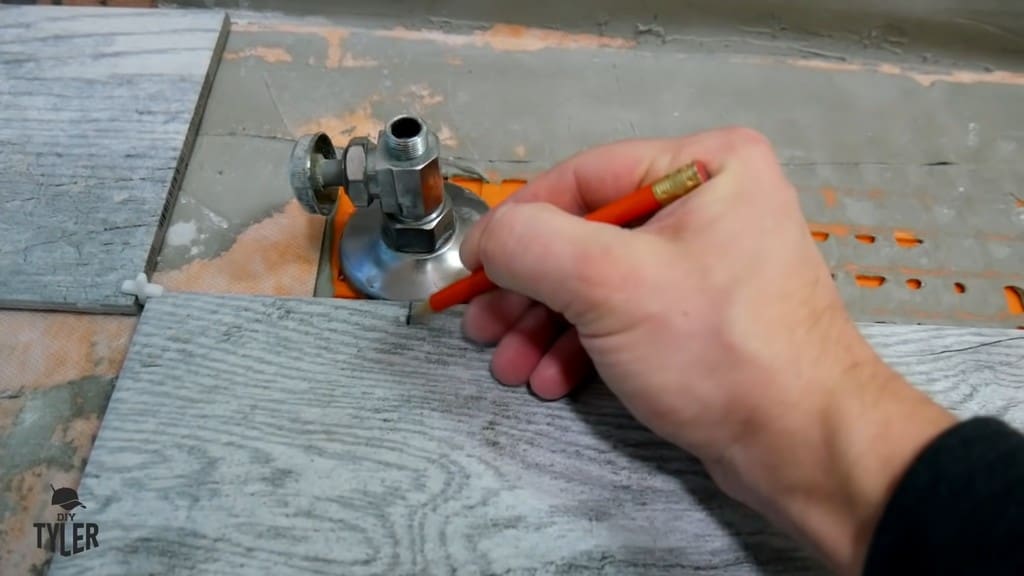
For the toilet flange, I found that I would be able to cut about halfway through both tiles on the top and bottom halves of the hole.
That was good because it meant I didn’t have to worry about cutting too deeply into one tile. Doing so would have risked cracking it.
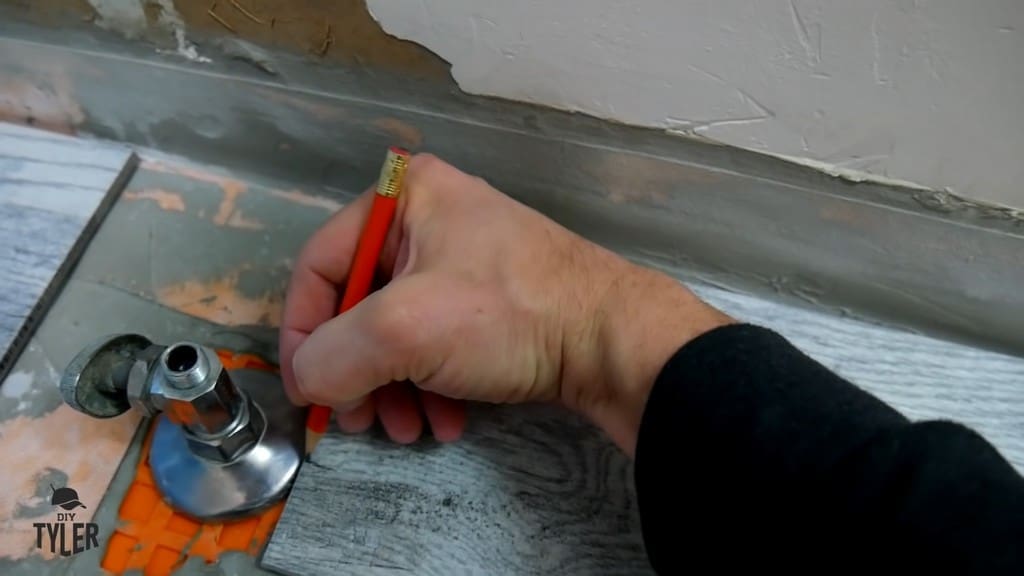
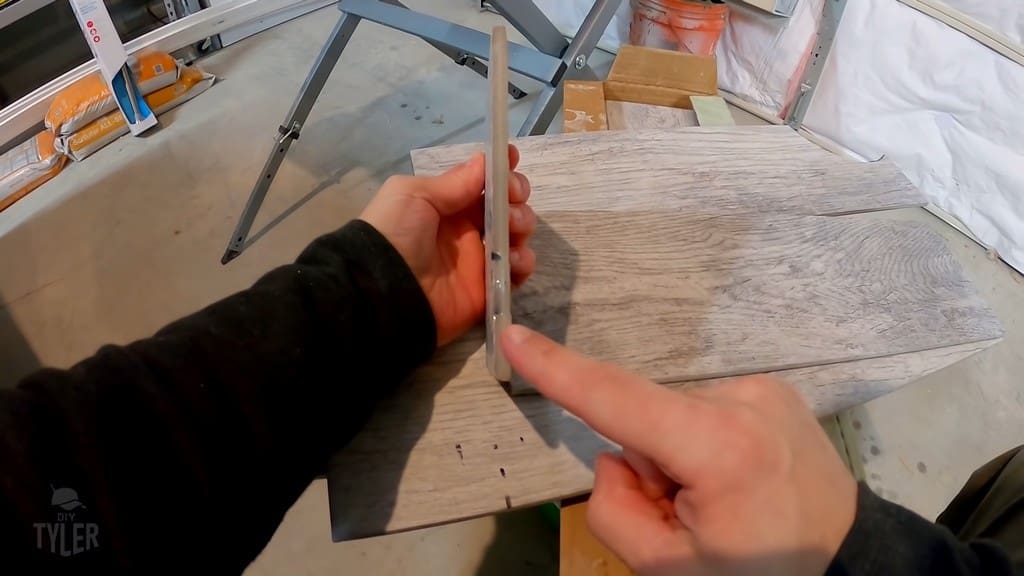
For the spout nearer to the wall, I made markings for where I would need to cut.
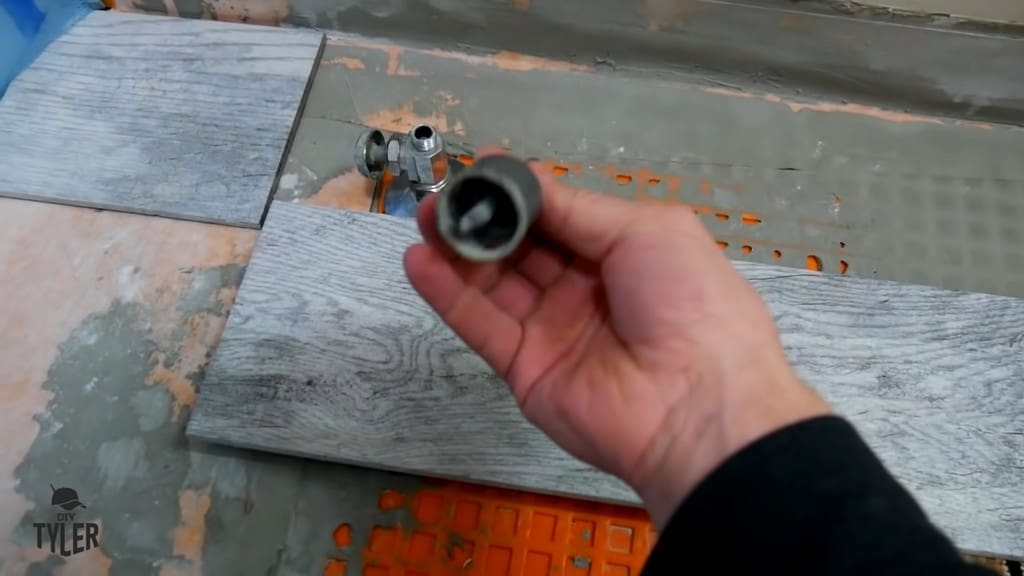
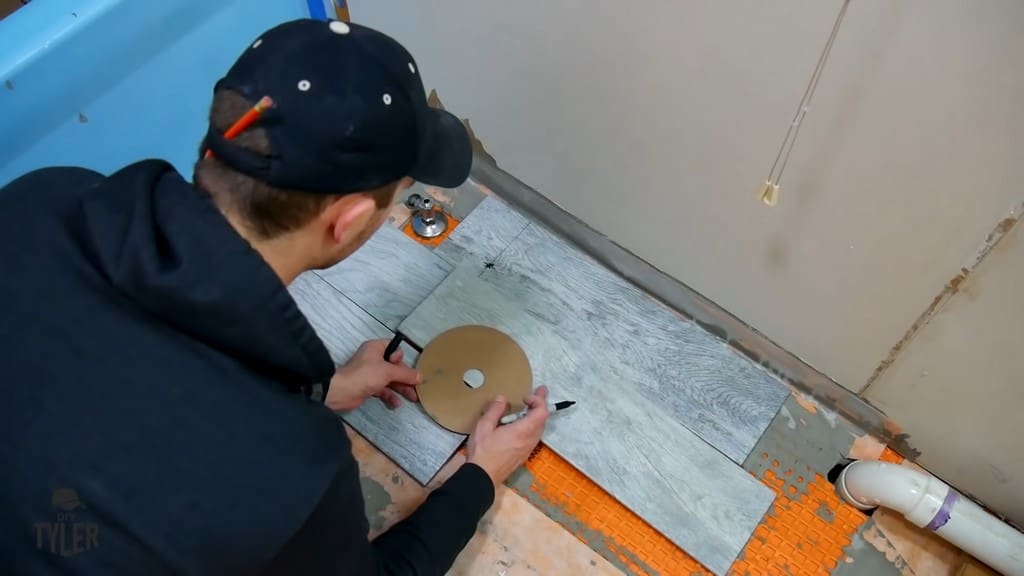
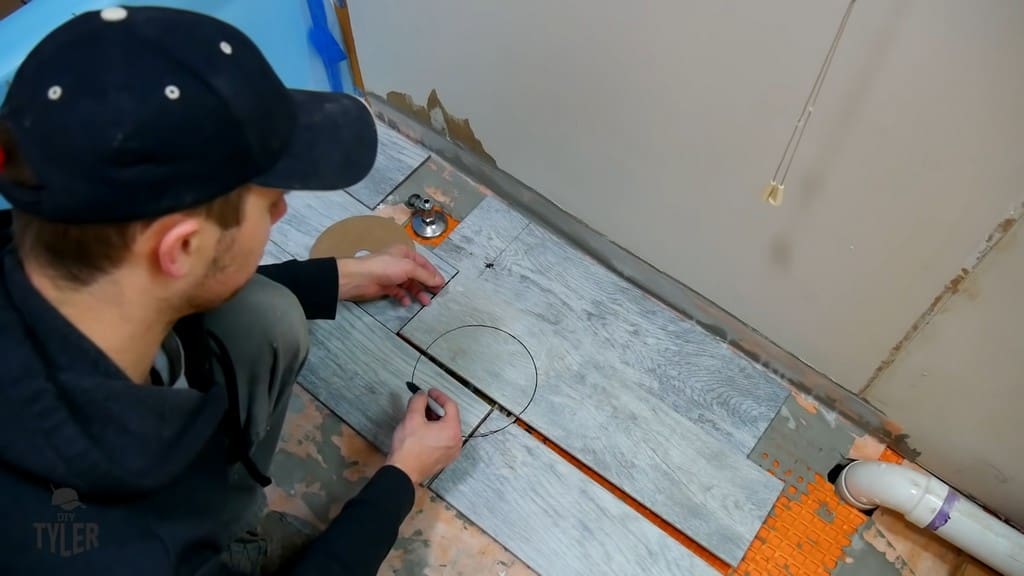
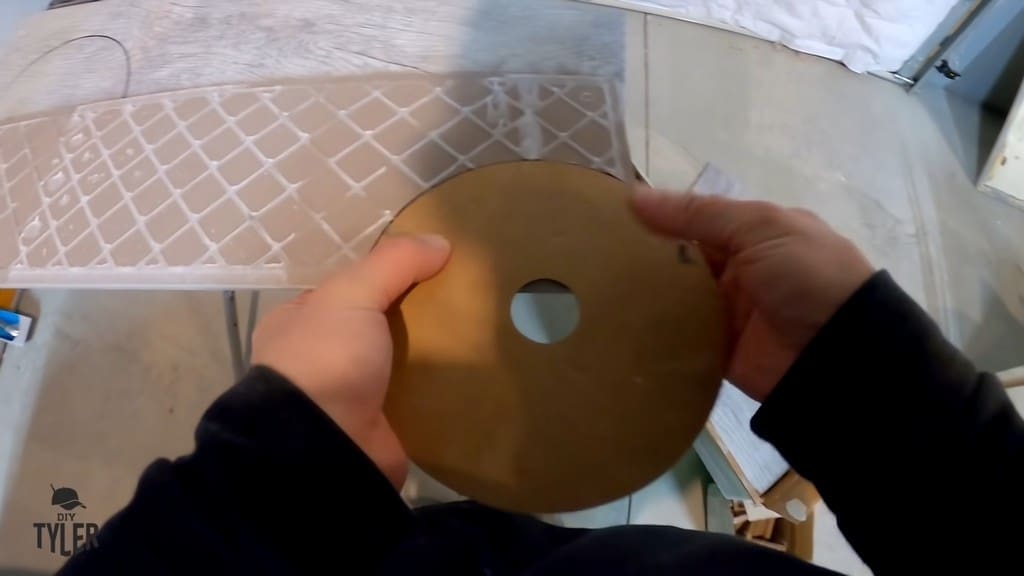
For the toilet flange, I used a cardboard cutout from a mixing valve that just so happened to match the size of the hole I needed to cut.
I also marked out the bottom of the tile so I could take into account the radius of the blade.
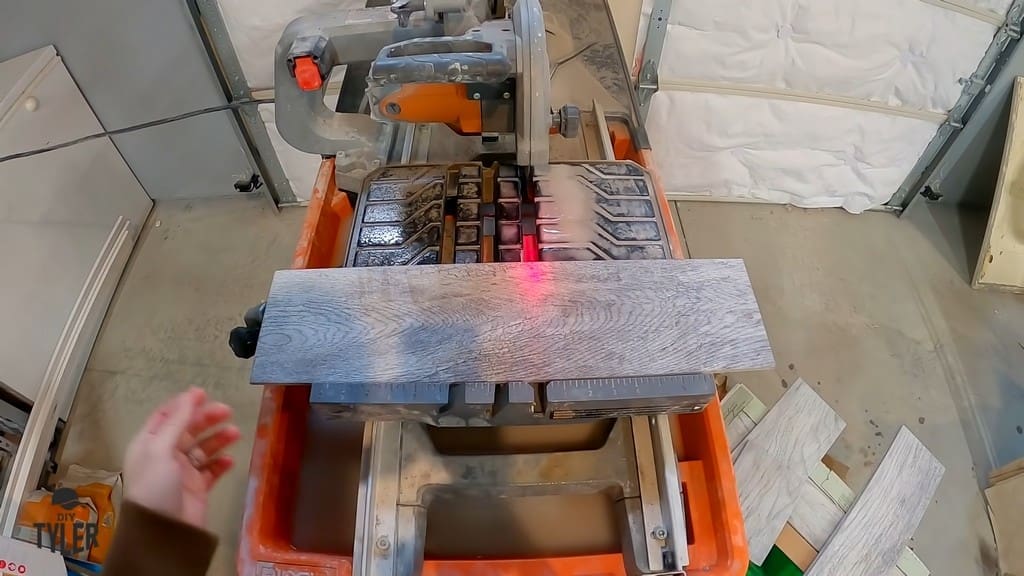
Unfortunately, I got halfway through cutting the tile with my carbide-tip piece before the tile broke in half. Plus, this broke the tip of the carbide saw itself.
To solve this problem, I decided to use a wet saw to transfer the desired hole onto a different piece of tile.
Installing the DIY Tiling
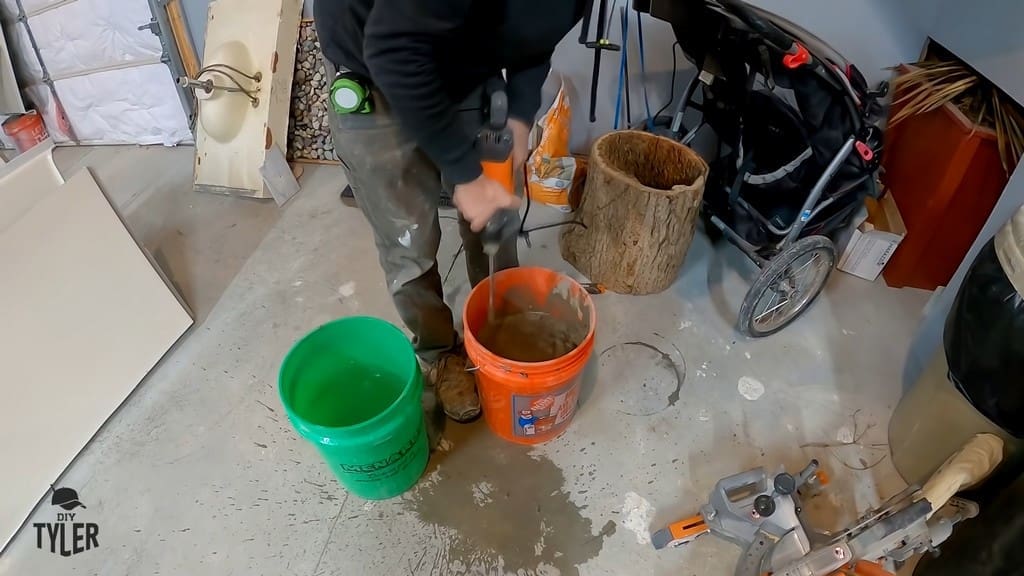
Mixing Mortar and Fixing a Reference Point
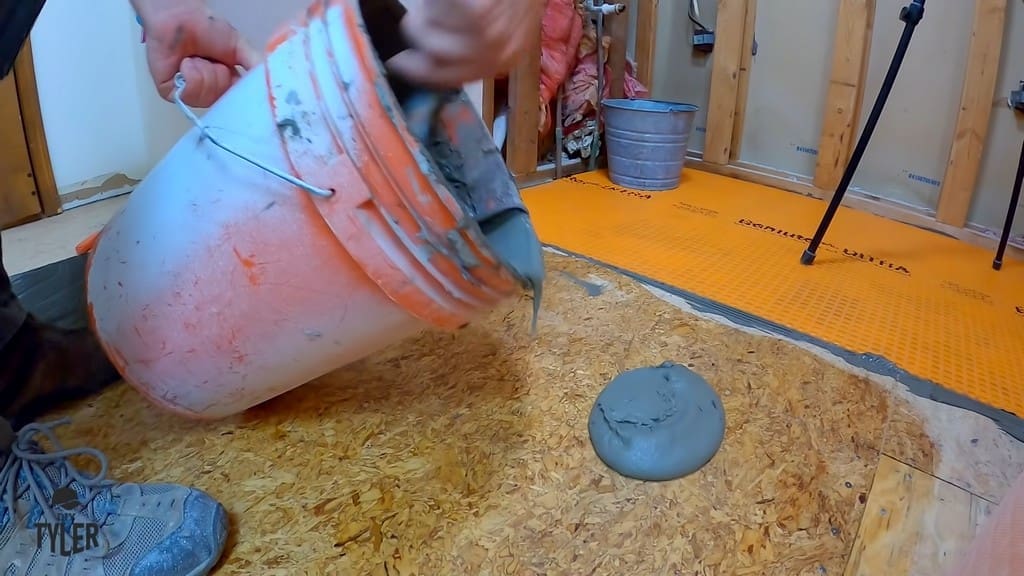
For the mortar, I used a 50-pound bag of Schluter ALL-SET mixed in a bucket of warm water.
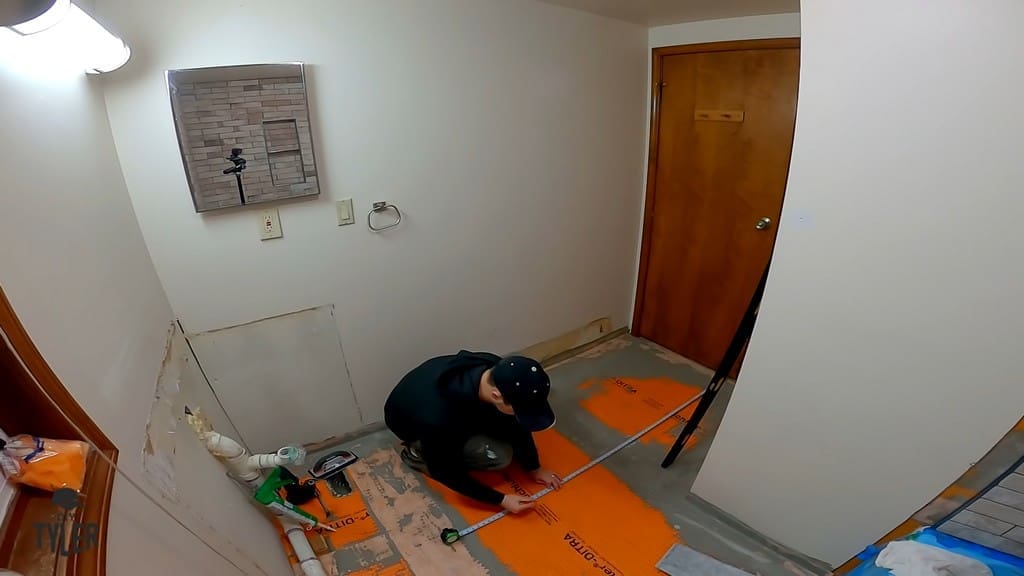
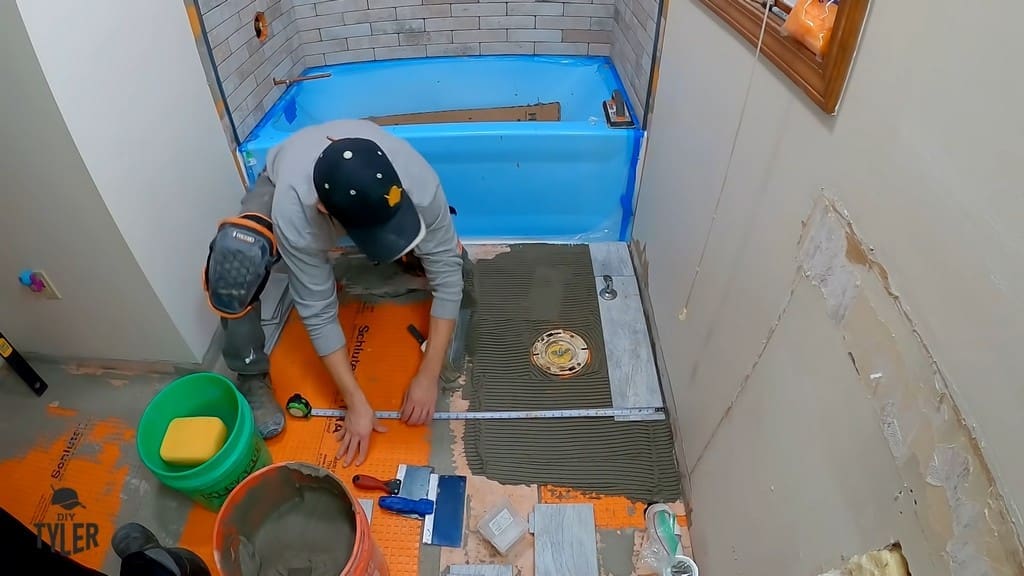
To make sure the tile would be set squarely in the room, I measured 60 inches out from where the hardwood floor in the hall was located.
I marked a straight line along the DITRA that I could use as a reference point.
I was able to measure from my starting wall to my reference line, confirming that it measured 39¼ all the way across at three different points.
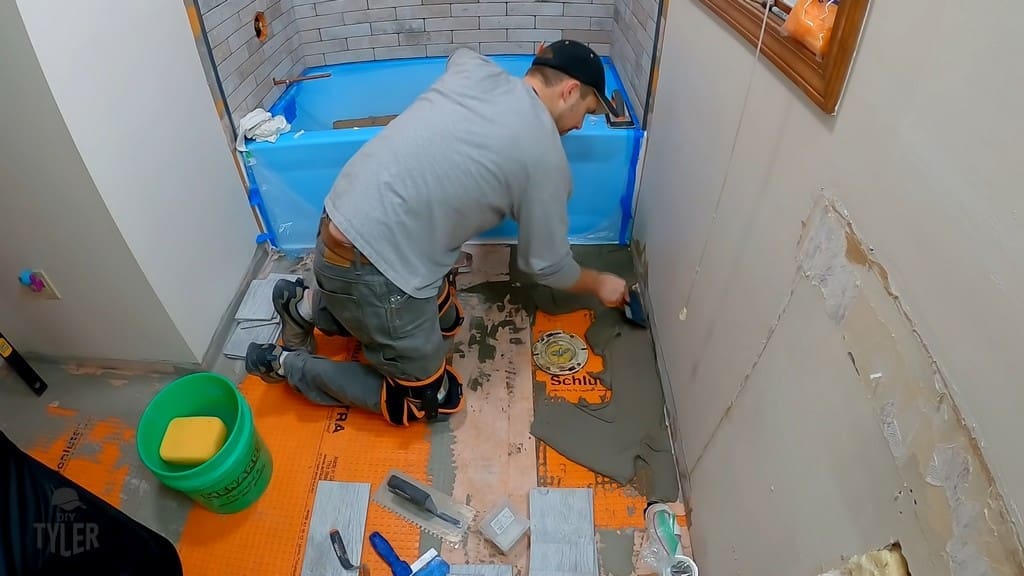
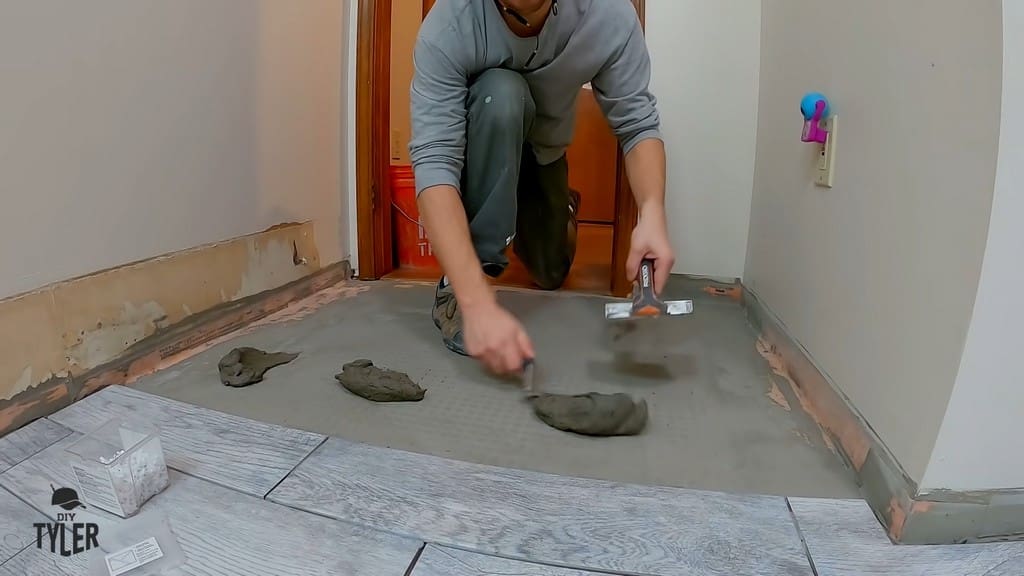
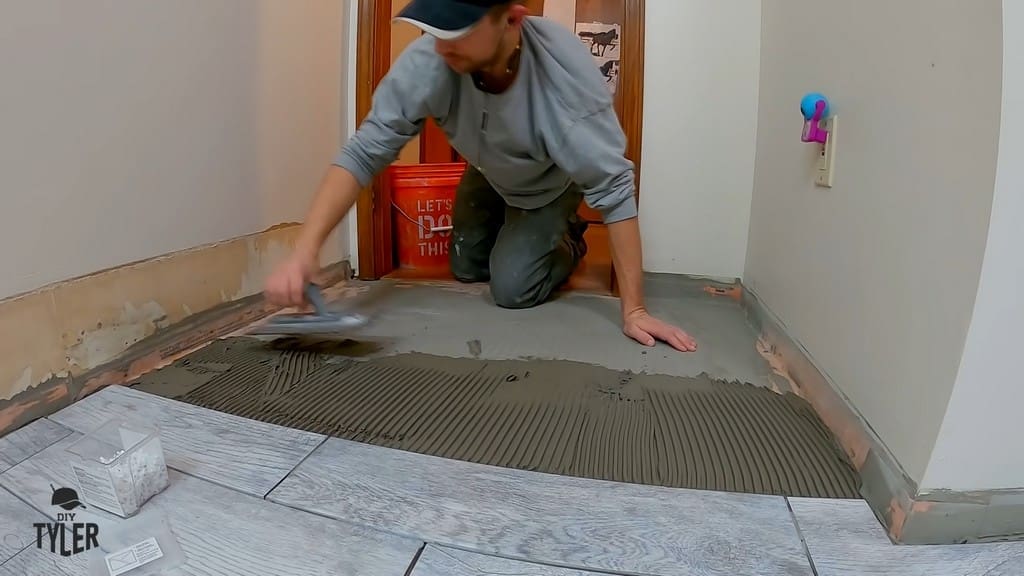
Applying Mortar and Laying Out Tile
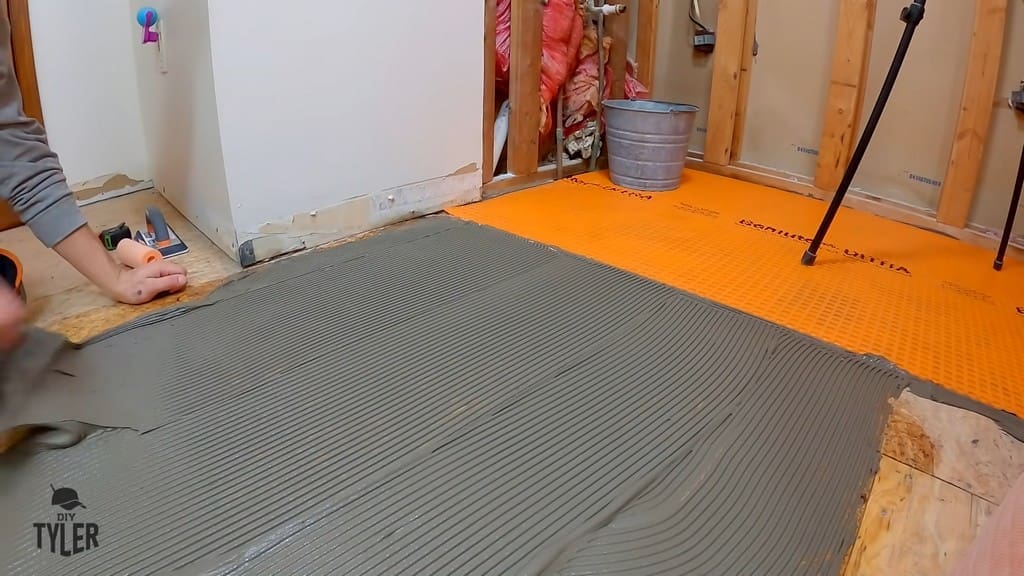
Before laying the DIY tiling, I scrubbed the underlayment with a damp sponge to remove any foreign debris.
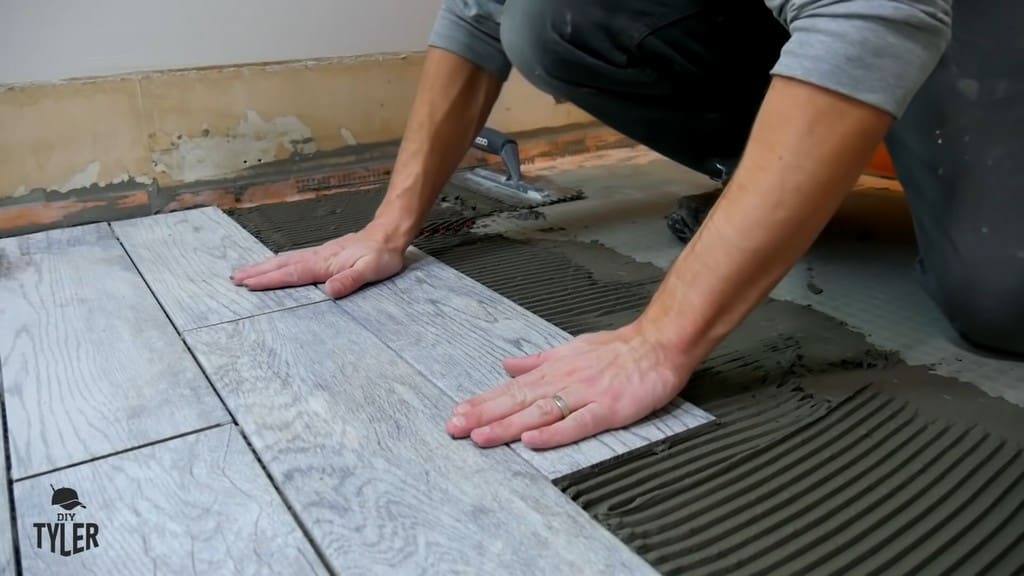
Next, I applied the mortar. Typically, your box of tiling will recommend the appropriate size of trowel to use. In my case, I used a quarter-inch by quarter-inch square notch trowel.
After trowelling some mortar in place, I laid out some tile. Once that was done, I used my reference line to verify that my first row was nice and squared.
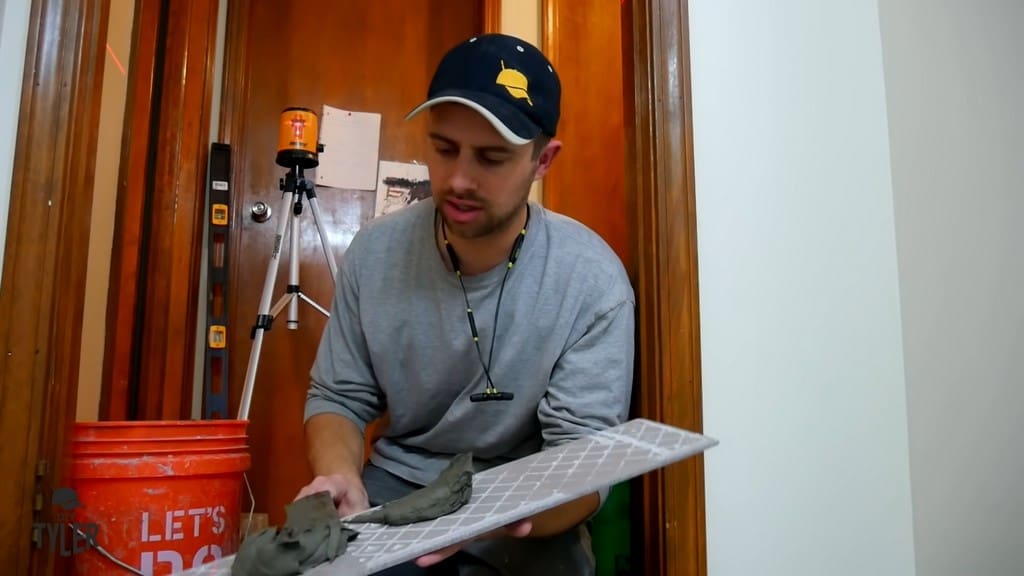
I also back-buttered each tile to ensure proper adhesion (more details on that below).
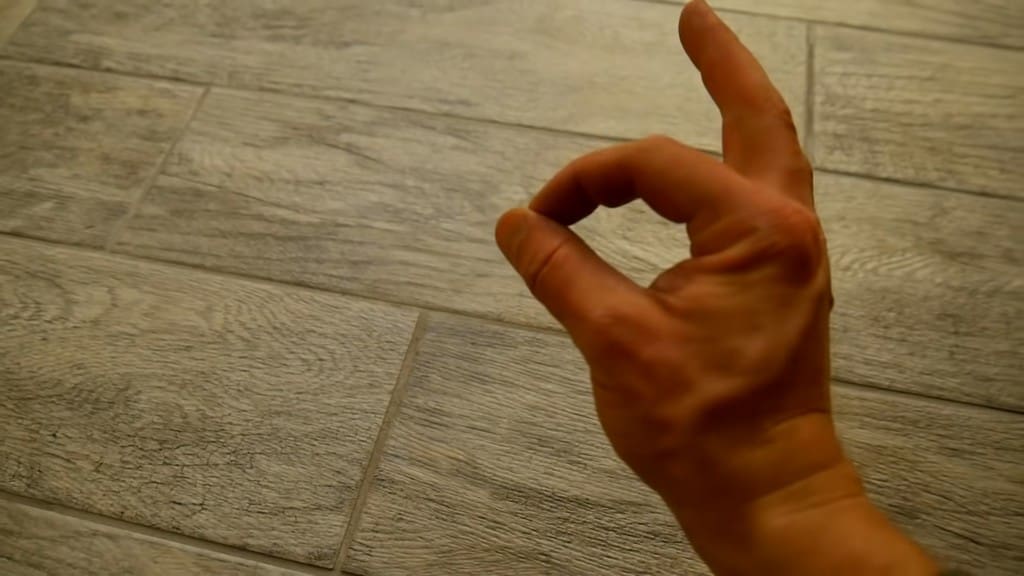
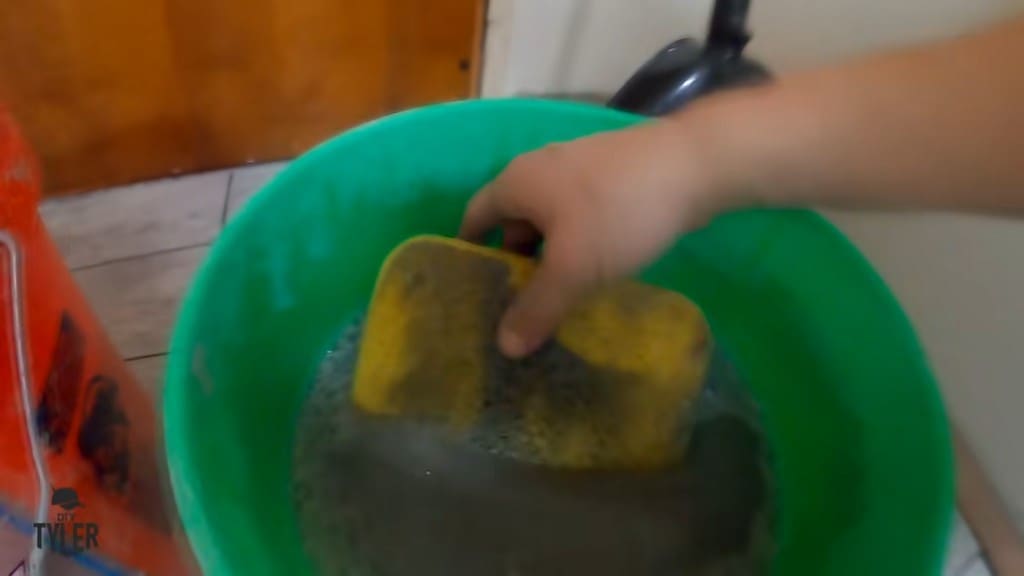
Your best friend for laying tile is a bucket of clean water and a sponge. You can use this sponge for everything: cleaning the walls, wiping the tiles, and even cleaning yourself and your tools.
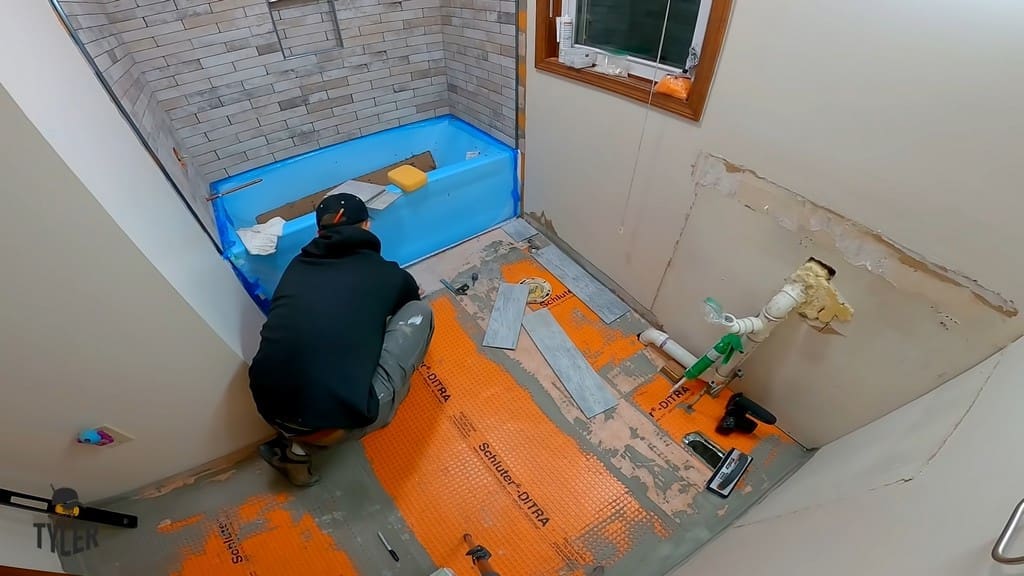
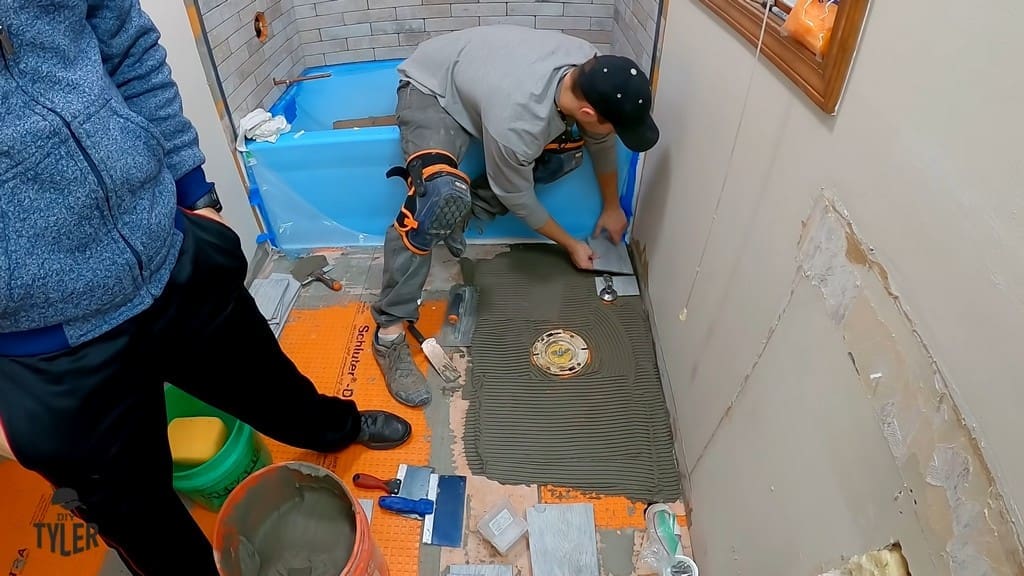
Here we are laying out tile in the largest part of the bathroom.
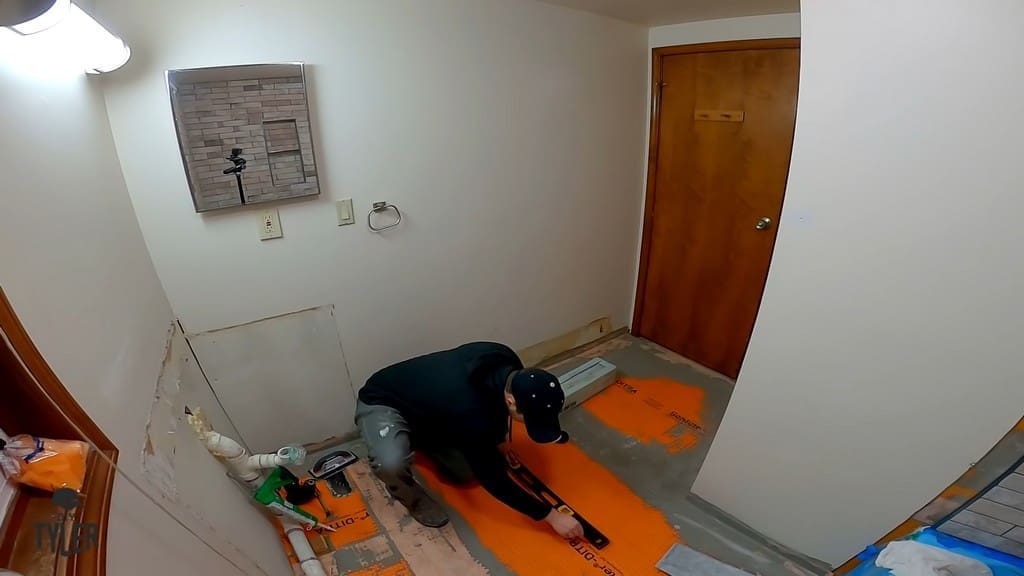
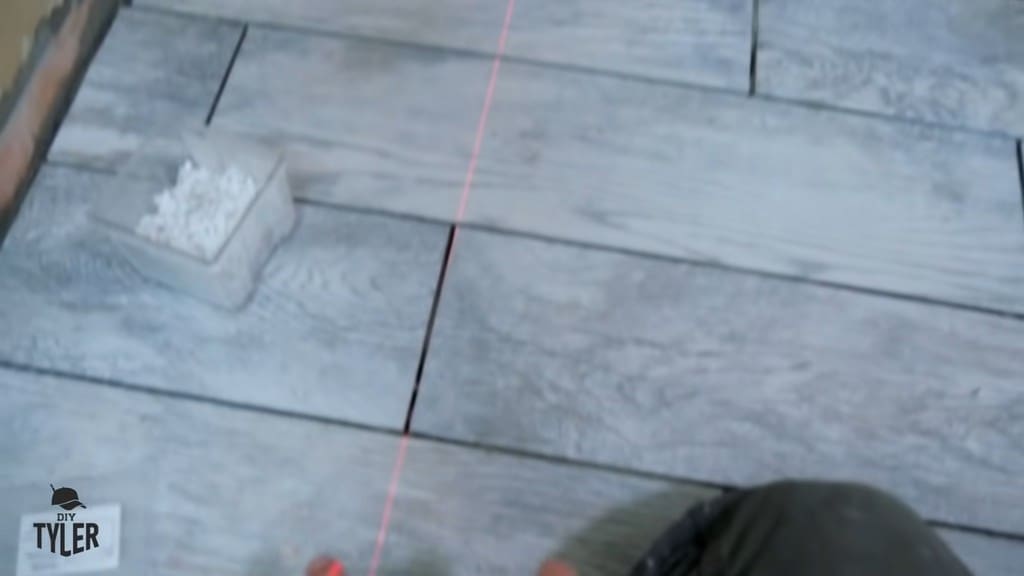
Because this next section went off of a corner, I set up my laser level to create a reference point for the next row.
Following this, I laid out the next batch of mortar for the rest of the bathroom.
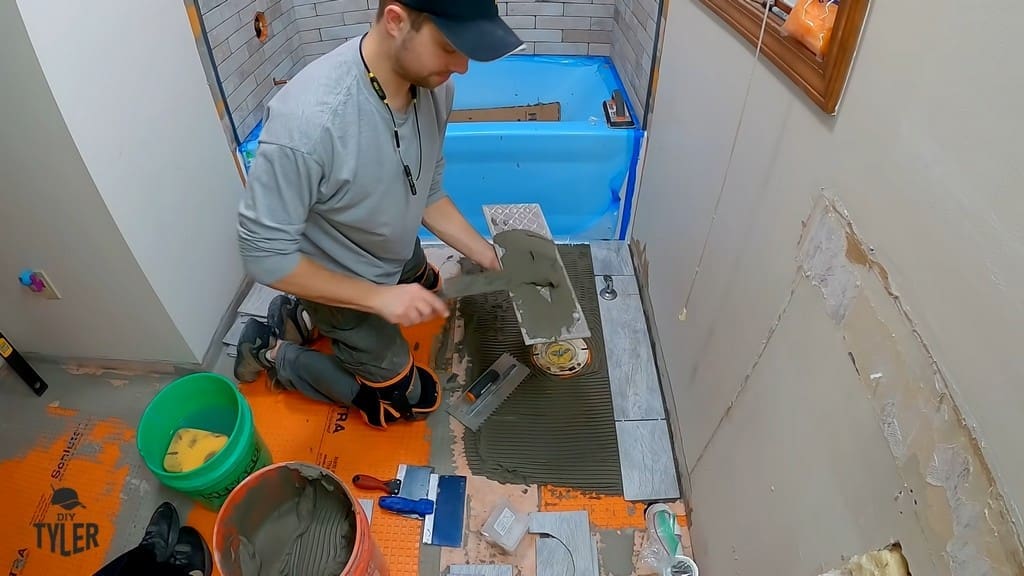
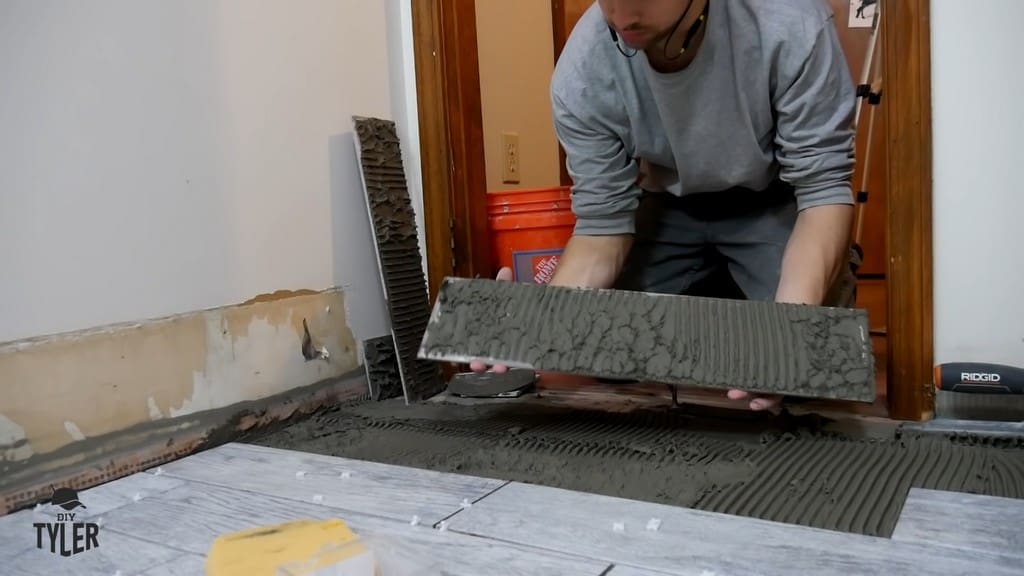
How to Back Butter
For back buttering, you don’t need a ton of mortar on the bottom of the tiles. You just need enough to make the surface wet so it can stick to your mortar on the subflooring.
In addition, make sure the back butter layer is nice and even.
Checking Your DIY Tiling
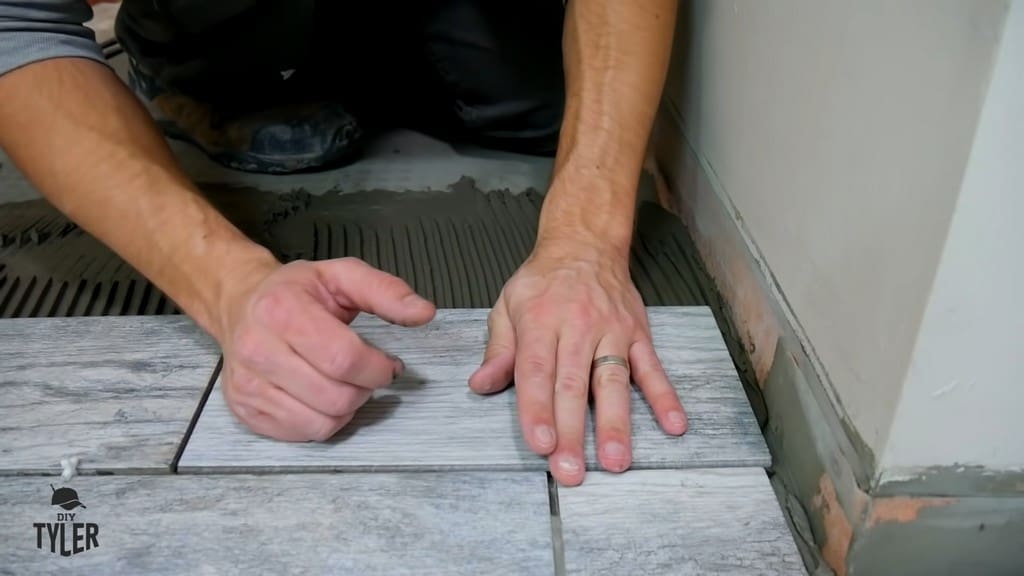
As you install your tiles, it’s a good idea to occasionally pull one up and look at the back. This allows you to check for full coverage, which will prevent cracking in the future.
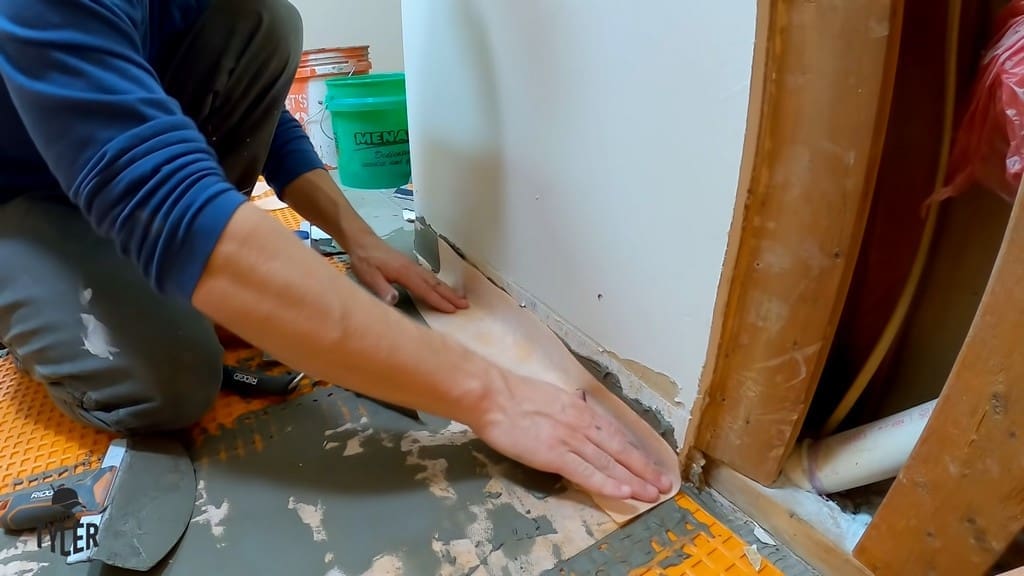
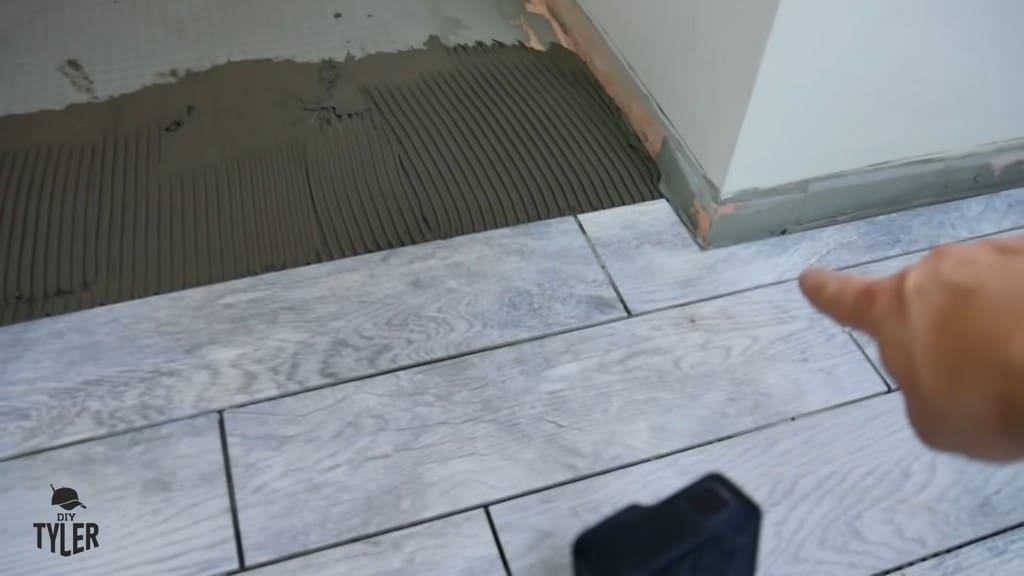
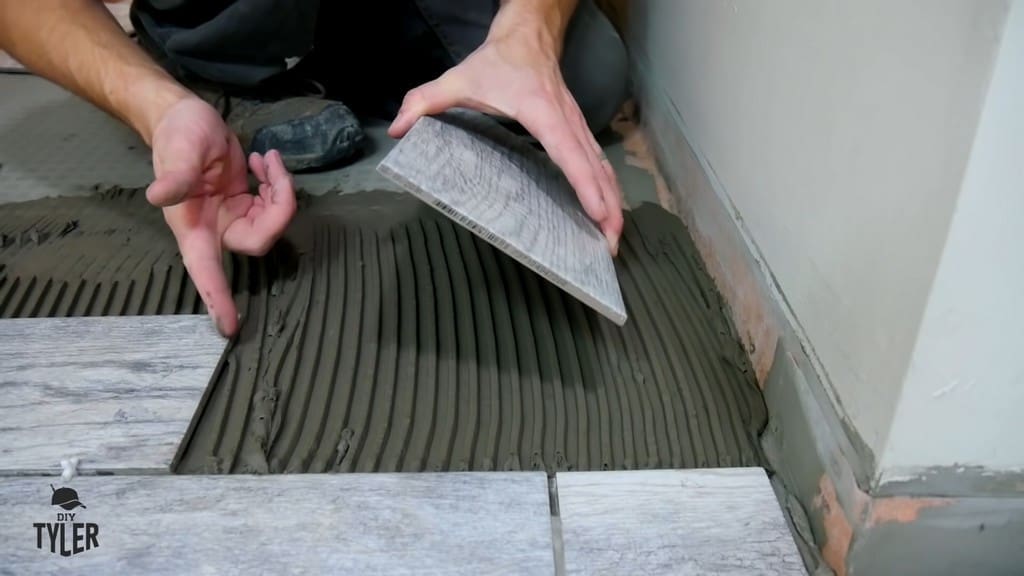
For cut pieces of tile that go up against the wall, make sure to put the factory edge next to another piece of tile. Keep the cut edge against the wall, where it will be covered up with trim.
Since tile does actually move, you want to leave a bit of gap next to the wall.
Finishing Up with Grout and Sealer
Afterward, I prepared grout that had a consistency like dry cookie dough. I smashed it into the grout lines, let it sit for about 20 minutes, then cleaned it off with a sponge.
Swipe your sponge along the grout line, rotating it upward as you go. This makes sure you’re always applying a fresh, clean portion of the sponge to the tile.
Keep rotating your sponge until you run out of clean spots on it. Once your sponge has become covered in smeared grout, give it a rinse in a bucket of clean water.
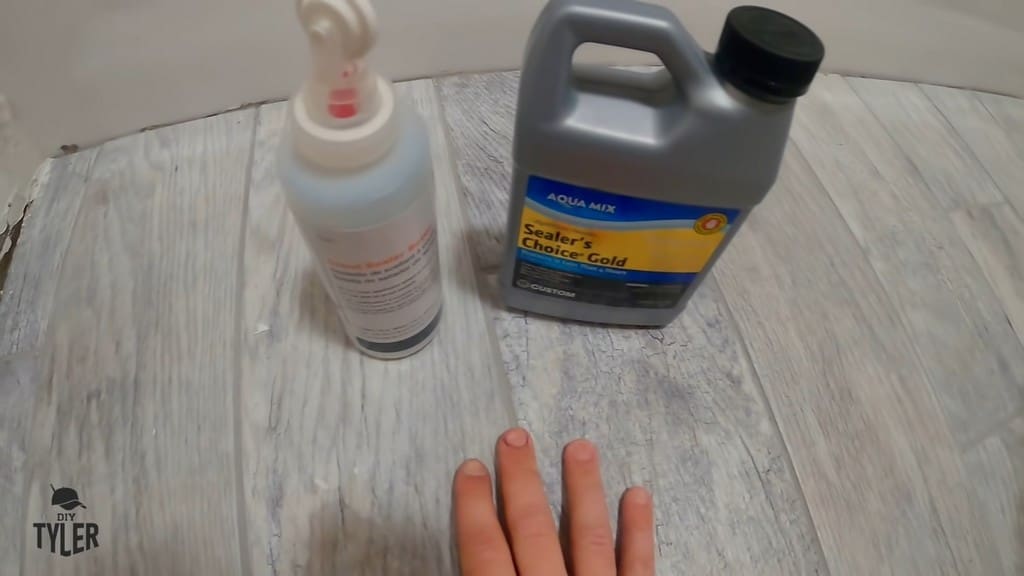
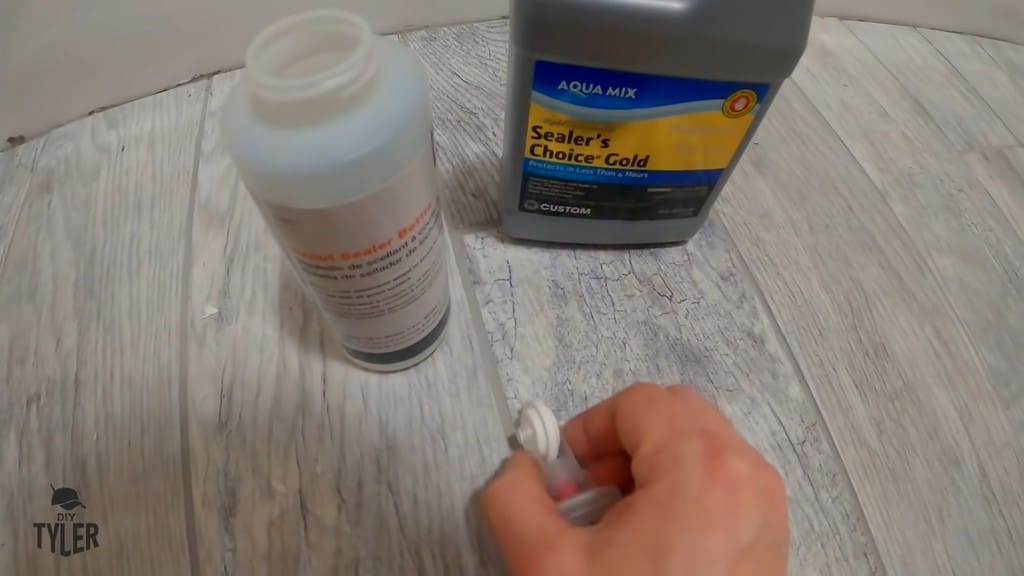
After your cleaned grout has set up for a day or two, you can apply sealer. The brand I used is quite expensive, but it has lasted for over a year in a different room I used it for.
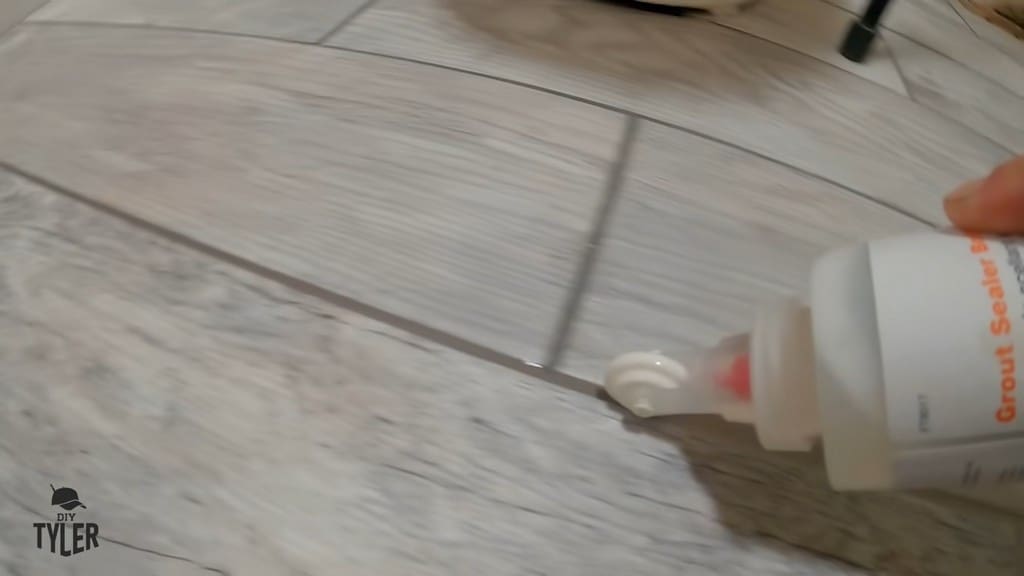
Finally, you’ll also want to snag a grout sealer bottle, which you’ll run into the grout line as shown.
Final Thoughts
Look at what difference a nice set of DIY tiling makes for a room! Especially when compared to the linoleum we had before, this is a beautiful new floor.
If you appreciate these step-by-step guides, check out my other videos for this bathroom!
Please follow and like us:
6 thoughts on “First-Time DIY Tiling 101 | Step by Step to Installing Tile”
Ahmed
Thanks, l am following your step by step tiling, l may not find typically products but similar and will be in touch any out comes of barriers and so on.
Thanks for your post it encourage me that l can do it.
At The Carpet Man Company, we specialize in providing top-quality flooring solutions for homes and businesses. With years of industry experience, we offer a wide range of options including carpet, hardwood, laminate, vinyl, and tile flooring. Our goal is to help you find the perfect floor that fits your style, needs, and budget.


6 thoughts on “First-Time DIY Tiling 101 | Step by Step to Installing Tile”
Thanks, l am following your step by step tiling, l may not find typically products but similar and will be in touch any out comes of barriers and so on.
Thanks for your post it encourage me that l can do it.
Excellent step-by-step guide for first-time tilers! Your detailed instructions and practical tips make DIY tiling approachable and achievable.
At The Carpet Man Company, we specialize in providing top-quality flooring solutions for homes and businesses. With years of industry experience, we offer a wide range of options including carpet, hardwood, laminate, vinyl, and tile flooring. Our goal is to help you find the perfect floor that fits your style, needs, and budget.
You are doing great job.. keep it up 🥰☝️
Pingback: How to lay ceramic tile flooring at home by yourself without cracks
Wow! Thank you for sharing this! A step-by-step guide is really helpful for first-timers. I really appreciate your guide!