Many of you have been following along our home addition process, and thank you for that. We really love what we’ve done to the place!
However, as beautiful as the inside of our house has become, the Landscaping had to wait until Spring. Spring came, and so did endless rain.
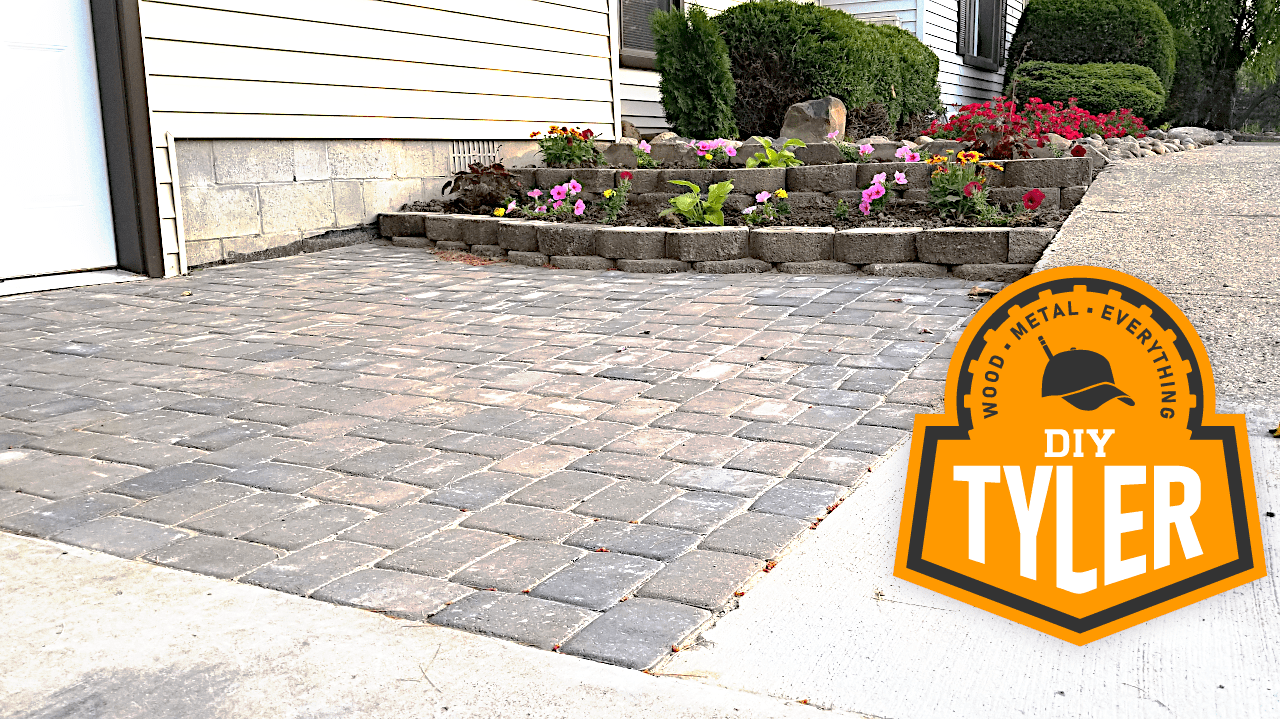
It’s finally dry enough to move around some dirt and make a welcoming paver patio outside our new entry! And with that, some tiered garden beds to transition into the slope of our home’s elevation.
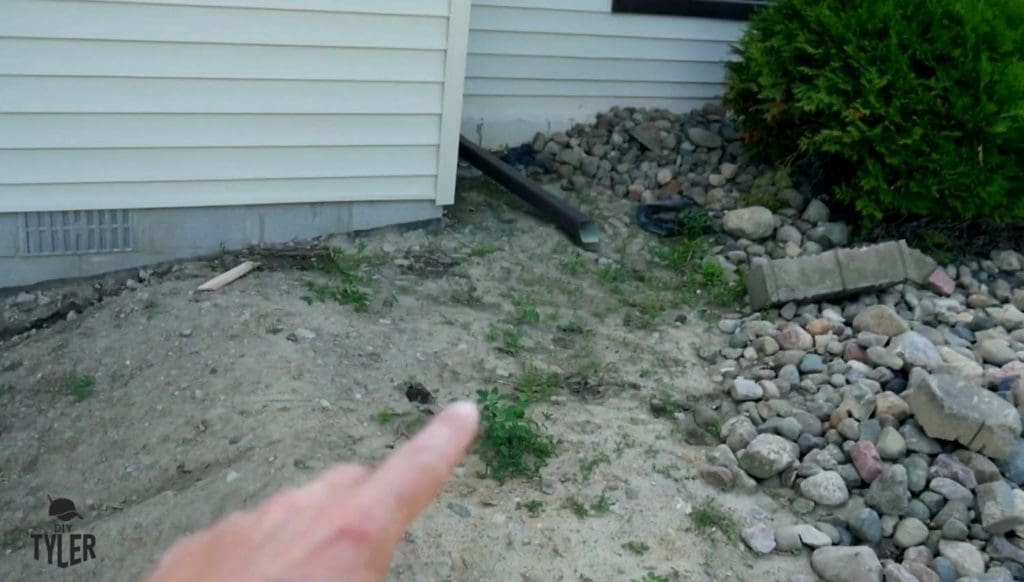
From this:
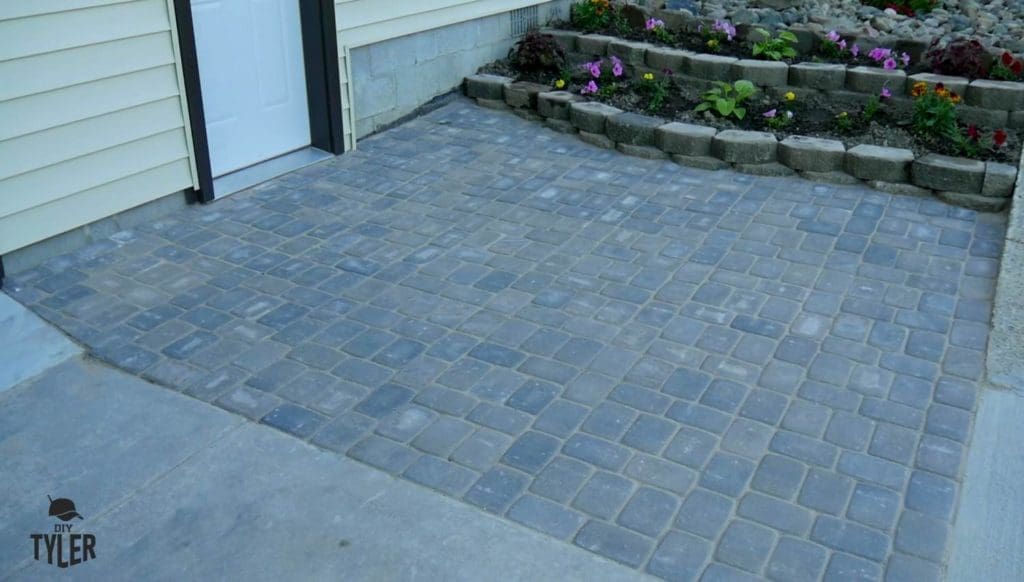
To this!
I have always enjoyed Landscaping work. Or maybe I just appreciate the finished project? In any case, let’s get to work.
Preparing the Surface
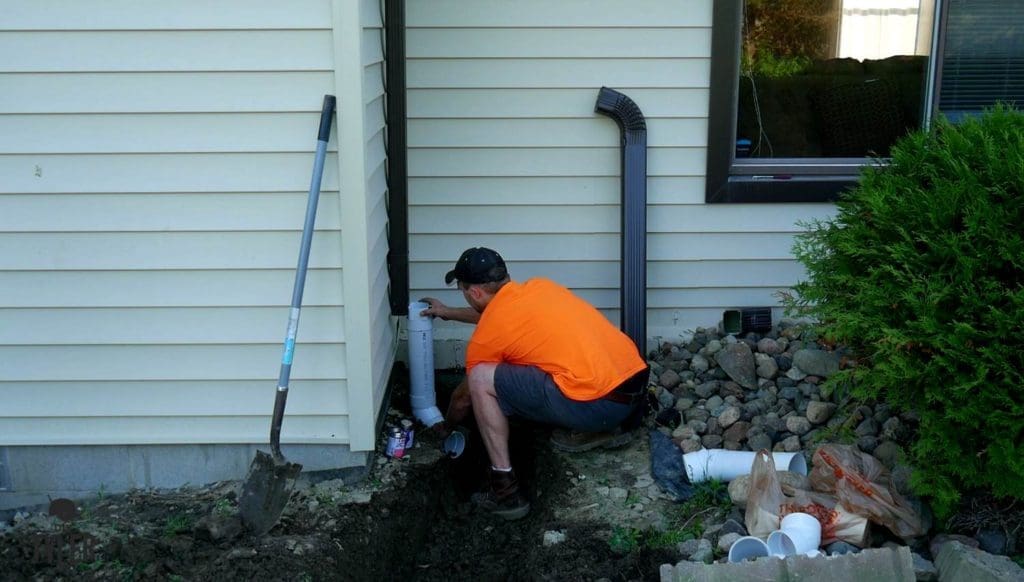
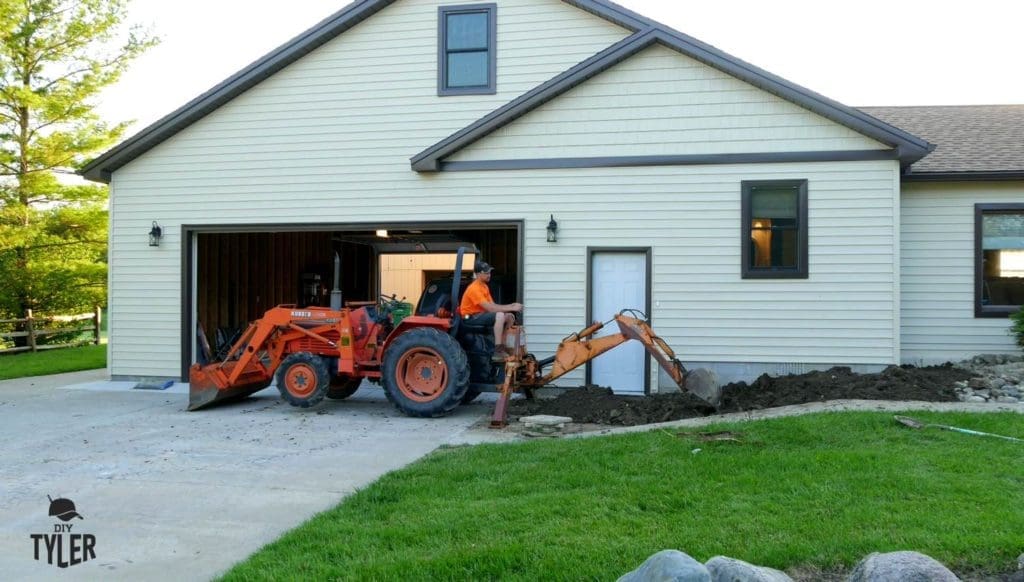
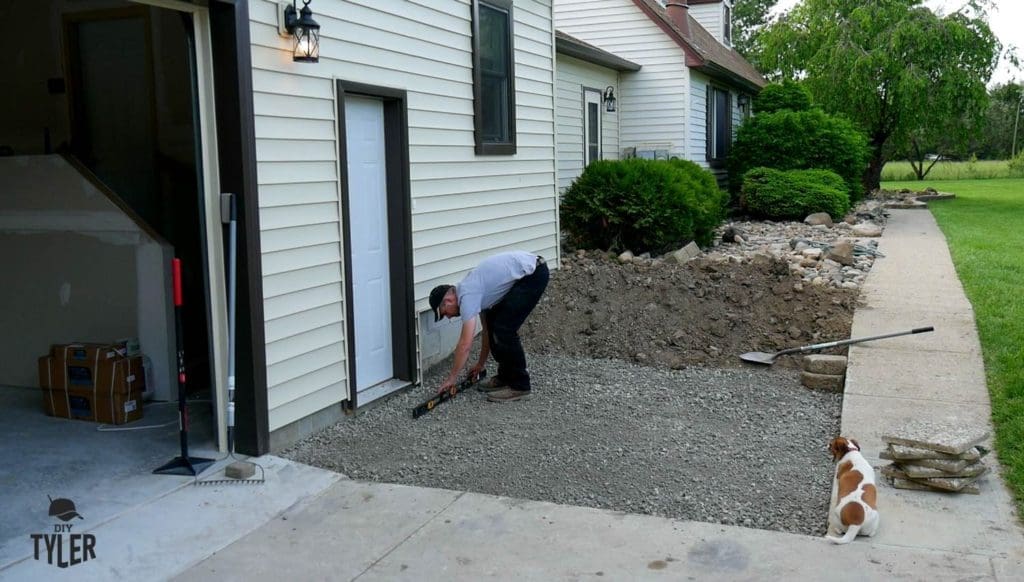
First order of business today will be calling around for a tractor. There’s no way I’m doing this by hand! My Dad graced me with use of his Kubota, and I started out by digging a trench from the corner of the house to the sidewalk, locating the underground drainpipe for our Gutters.
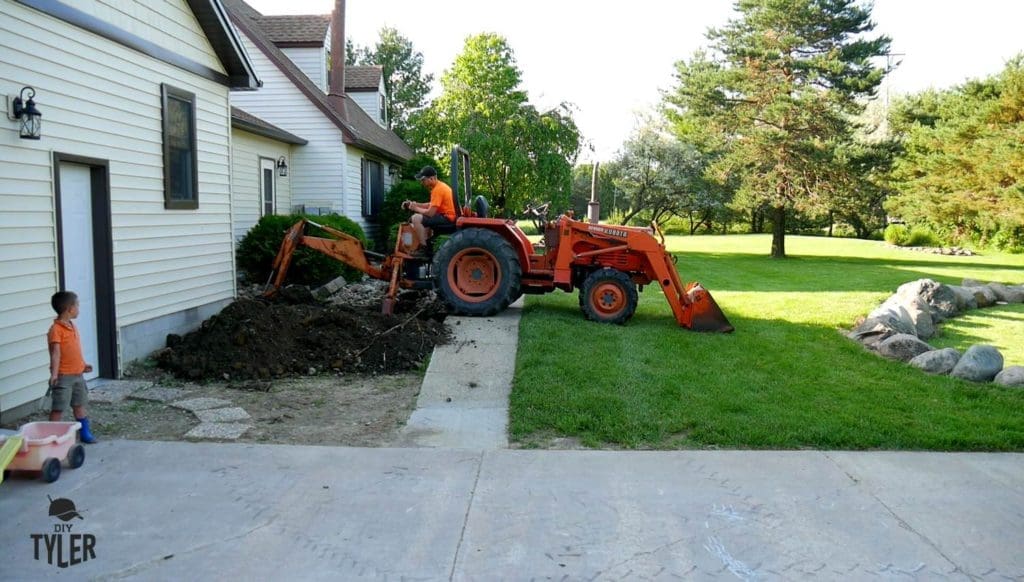
I then made the attachment using sewer and drainpipe from the big box stores, and sloped the gutter runoff appropriately away from the house. We first back-filled it in by hand, and then with the tractor, and went right to clearing away dirt for the Paver area.
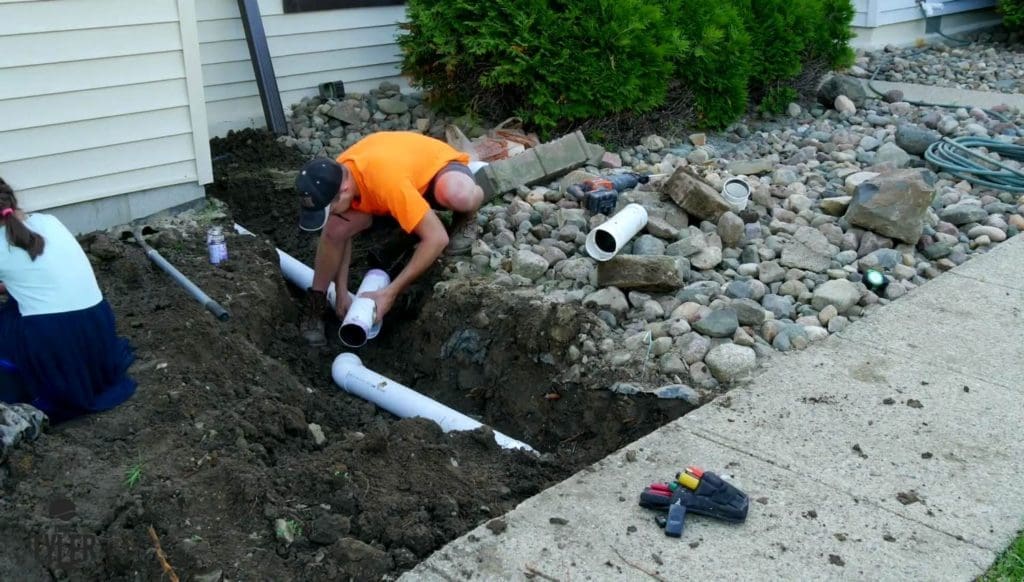
I took out about 4-6 inches of dirt and moved it to the back of the property, then it was back to shovel and rake for the tight spots and to create the surface slope that we needed for water drainage.

Laying the base
Firstly, landscape fabric.
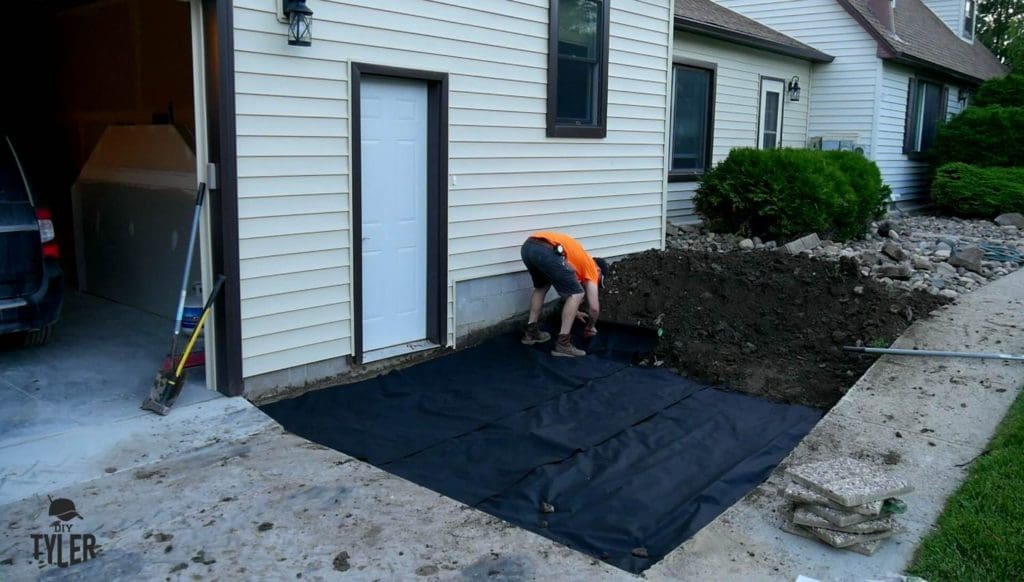
Then, Since this has already been back-filled in with 21AA base initially, we only need to put down 2-4 inches of 21AA today. This is the part of the project where sloping and drainage is key, because the final result of your pavers will rest on however this step is laid out.
Cool little side note here…have you ever seen one of these truck bed cranking unloaders? I don’t even know what they’re called, but for $35 from Harbor Freight, I turned my pickup into a dump truck and felt a little bit of boyhood come back. Look at that face!

Next we leveled the gravel, compacted it by hand, checked the sloping and was ready to move on.
The 21AA base that I put down had a lot of larger pieces of gravel in the mix,especially in the back corner,so I needed to add some Paver sand and rake it around a little. I hand compacted it solid, but what it really needed was water to solidify the whole base.
A garden hose worked great for this, and we let the wet mix set for a day or two before continuing on with the project.
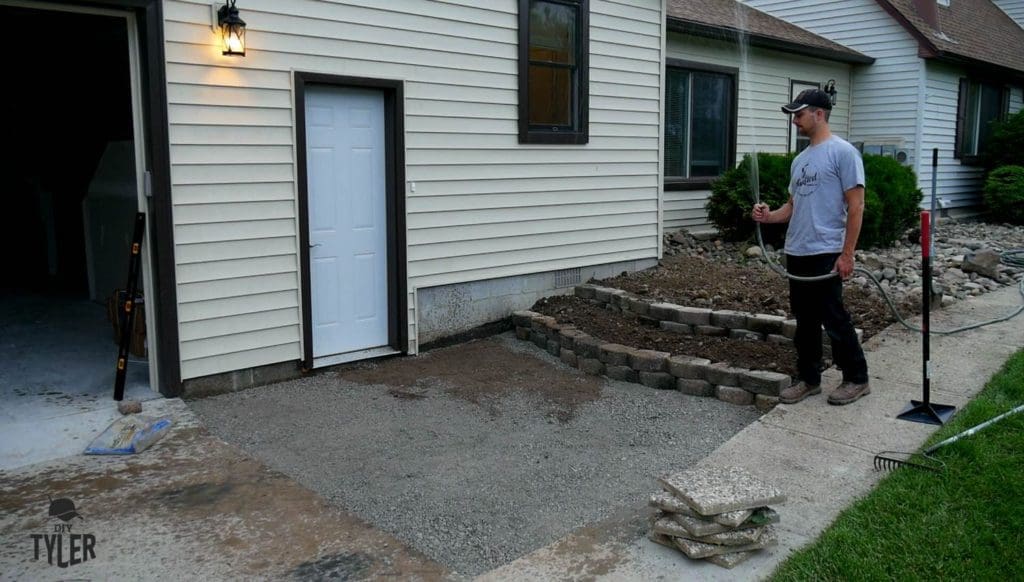
But wait! The flower beds
Our tiered beds are a very simple concept.
Large paver bricks set in place, hand compact, and repeat. Lay down some landscape fabric, fill it in with dirt, and enjoy the process of planting your posies.


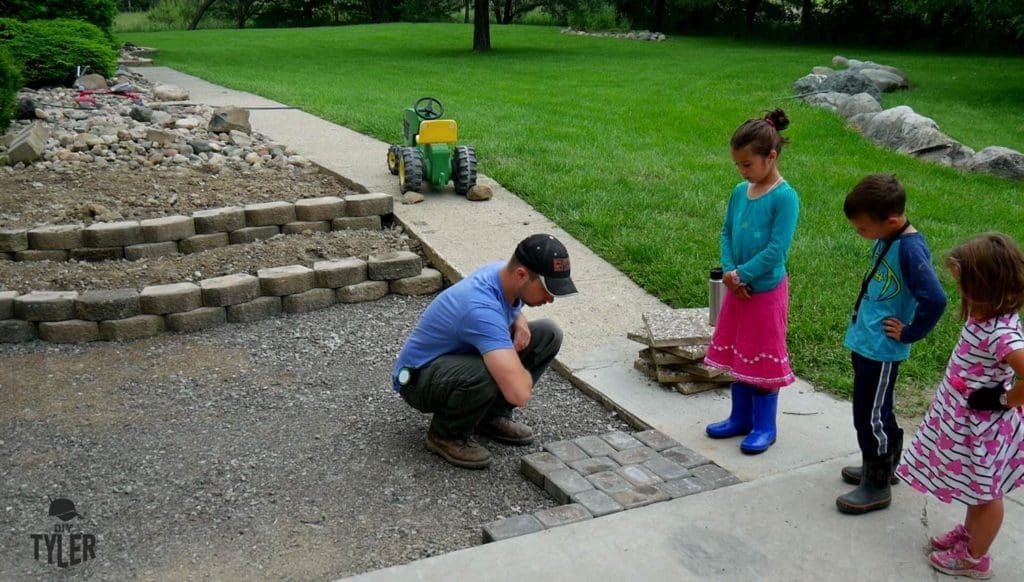
Laying the Pavers
The pavers that we used are a Beige tumble stone and are approximately 4 1/2 x7 inches in size. The process is the same regardless of dimension though, and the pattern that you choose to lay your pavers simply depends on your preference… and the amount of time you want to spend getting creative.
My kids were very helpful with this project and pitched right in, getting the pavers off the trailer and stacking them within my reach as fast as I could lay them. All 400 or so that we needed! Notice my son’s tractor in the background, and how he put Rocks behind his tires so it wouldn’t roll away. They notice everything, don’t they?

I like to keep a handheld spade nearby during the laying process, to remove any dirt and also to tap the bricks in place. A rubber mallet would have been a smart idea, too.
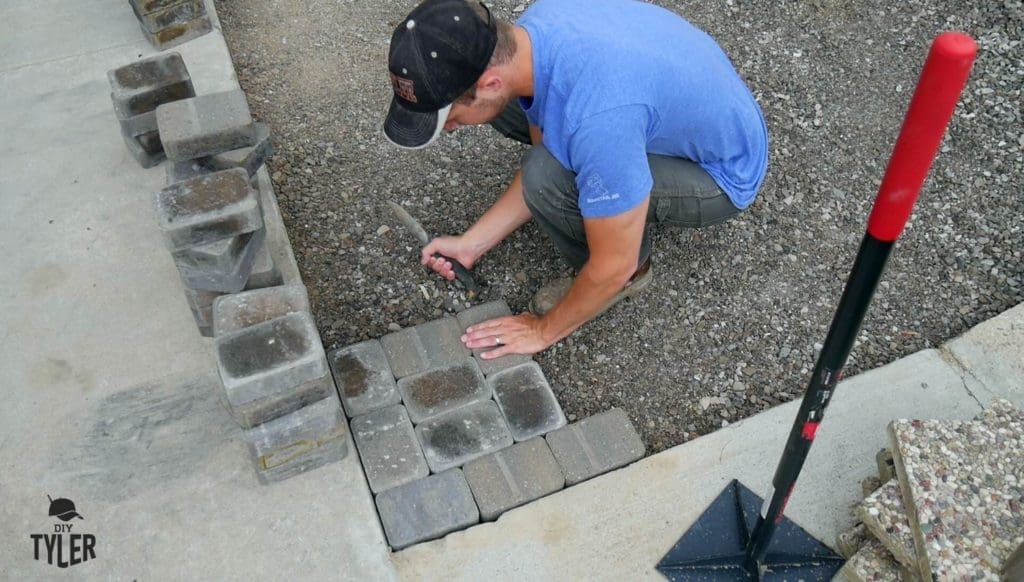
My RIDGID tile saw ended up being the perfect tool to cut the outer bricks and angles, and it worked splendidly. Where it didn’t cut through, I was able to cut partway and knock the rest of the brick off with a hammer.


Finally, the last round of hand compacting! My shoulders ached for days after this project, but I digress.

To lock all of the bricks in place, I dumped on a couple bags of playsand and swept, and swept, until every nook and cranny had been filled. A few of you suggested using polymeric sand or even a bag of concrete for this final touch, and both are good ideas. We just went with what we’ve done before, with great success.

What an improvement!

Parting Thoughts
My wife enjoyed planting the flowers (and waters them faithfully!) and we made a cute little planter flower pot for beside the door, as well.

She likes it so much we made a video on the planter specifically, with plans available HERE. It really completes the look of our new entryway, and gives it a warm, country sort of welcome.

Or maybe it’s that big smile.
Please follow and like us:
1 thought on “Laying A Paver Patio”
Wow! what a journey you had with your paver patio. great of you to share your experience. I enjoyed reading and watching your video, too. Great job on a stunning project well done!