After complete the table saw dust collector it was time to move on to a more advanced dust collection system. Not really thinking that I am going to be a super wood worker, we didn’t really want to spend the money right now for a full blown dust collector so the thought was to try and use the shop-vac as the source of vacuum. I understand that the airflow from a shop-vac is not nearly what is generated by a DC but I am not going to be putting too much dust out with the tools that I have. A lot of reading, thinking and changing my mind I finally decided to try and make a Thien baffle (Based on J. Phil Thien’s design, here) and use that in conjunction with the shop-vac.
The plans shown below are for basic 5-gallon bucket dust separator. Someday I may have to make a bigger baffle but for now this works like a charm.

|

|

Measured the bucket to get the diameter of the circles that I needed to cut for the Top lid, mid lid and the baffle. The lid is made from two pieces allowing the “Mid lid” to sit inside the rim of the bucket and the “top lid” to overhang the bucket a bit.

Above you can see the “Mid lid” on the bottom left corner of the plywood and the “Top lid” on the top right.

Made this simple jig that pinches a screw and a pencil in place to use as a compass, worked great and will keep it around for future projects.

Above is the baffle section of the dust collector. You will want 120° of the baffle left at the original diameter. Don’t need rocket science accurate for this.

Cut out the lids using the band saw.

Sanded the edges of the lids and chamfered them using the belt sander. A plan is in the works to make a jig based on John Heisz’s design (here) to hold the sander.

Gluing the top and mid lid together, never have enough clamps!

Fit on the bucket perfectly.

Measured out the pipe holes, drilled a starter hole and used the jig saw to cut out the holes.

|

|
Fitted the pipes and drilled holes for the threaded rod.

|

|
Cut the three threaded rods down to size. Used the drill press with wire bush to de-bur.

|

|
Used a pencil to mark up the bottom of the threaded rod and used that to mark on the baffle. Held the baffle in place with a few pieces of scrap 2×4.

Held the rod in place with a 2×4 and clamps so that I could properly tighten the bolts on the baffle.

Used some clear silicone caulk to provide a good seal around the PVC
|

The PVC fittings before gluing in place
|

Assembled baffle and lid.

Cut duct-tap, as shown above, to line the inside of the PVC that the shop-vac hose is going to plug into. This provided a snug fit and saved a ton of money since regular shop-vac fittings are quite expensive.

|

|
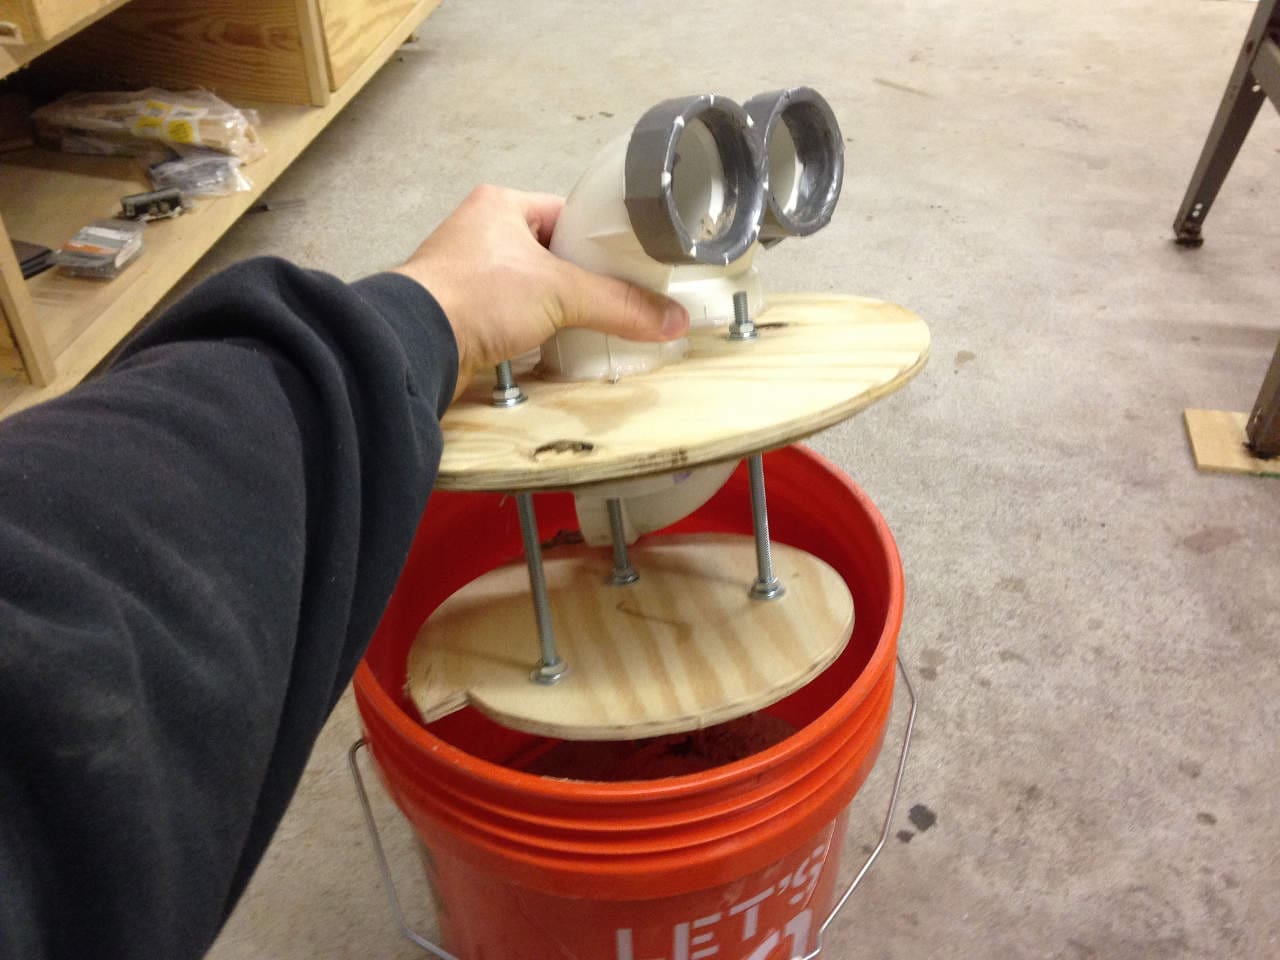
Finished baffle with shop-vac hoses attached. And a view showing how it fits into the bucket.
Pretty impressive! Worked way better than I ever thought it would. Definitely worth the time to build and would even recommend putting one of these baffles in front of your full size dust collector. Didn’t cost but maybe $10 to build since I only had to purchase the bucket, threaded rod, nuts and bolts and one or two of the PVC fittings.
Please follow and like us:
5 thoughts on “Dust Separator”
Sorry. How are you securing the unit top to the bucket? The inner diameter of a HD bucket opening is 11.25”, maybe even slightly larger. Your 11” inner circle won’t create a tight insert. I’ve been looking for an approach to keep the lid tight. Even if the inner circle was a perfect fit and the suction kept wood and plastic air tight, it would be easy to flip the top off and you’d be constantly making sure the hose doesn’t dislog it. I think it needs a rubber grommet and something to hold it down/tight.
Pingback: Woodshop | Pearltrees
very nice design you made , so can u share its efficiency with us
You can make it bigger by cutting the bottom out of the bucket and putting it into another bucket. Gets you 3″ mote depth.
Delete this. Nothing is showing