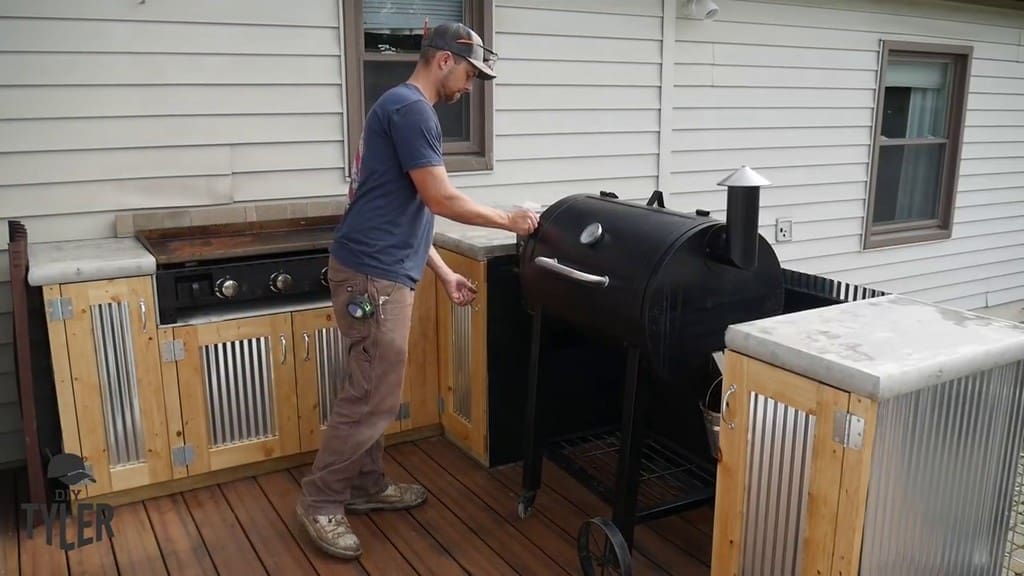
Why shouldn’t every guy live out his dream of enjoying a full grilling kitchen out on his deck? This DIY outdoor kitchen has it all.
Need a place to wrap your meats? This kitchen has plenty of concrete counter space.
Want to keep your pellets and grilling gear on hand yet out of sight? This kitchen offers loads of storage areas.
And, of course, there needs to be plenty of room for the stars of the show: the pellet smoker and propane griddle themselves.
Constructing the DIY Outdoor Kitchen Frame
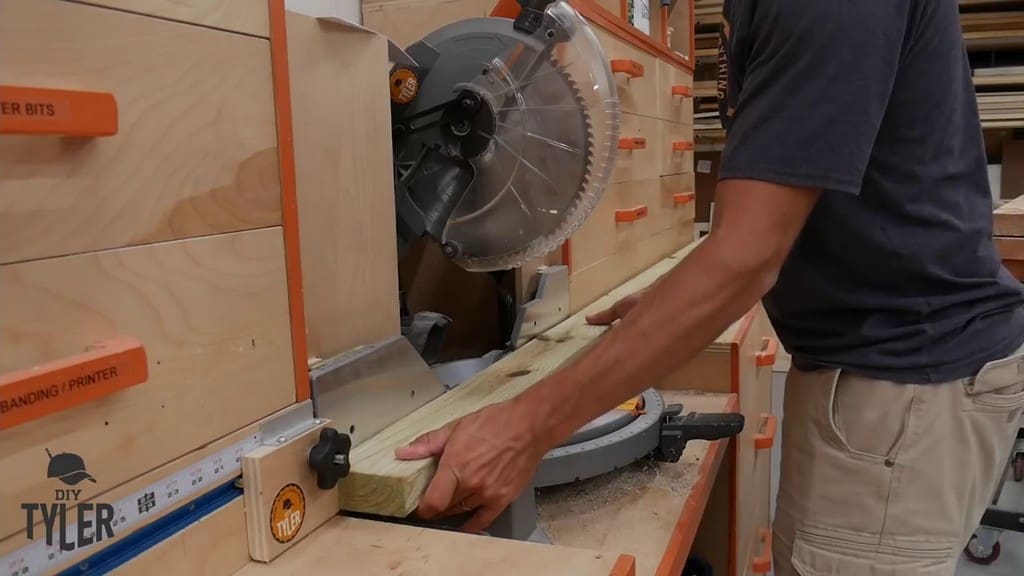
This outdoor kitchen DIY project starts with the frame, which consists of pressure-treated 2x4s. Using pressure-treated boards helps the wood to resist rotting in case any of it gets wet.
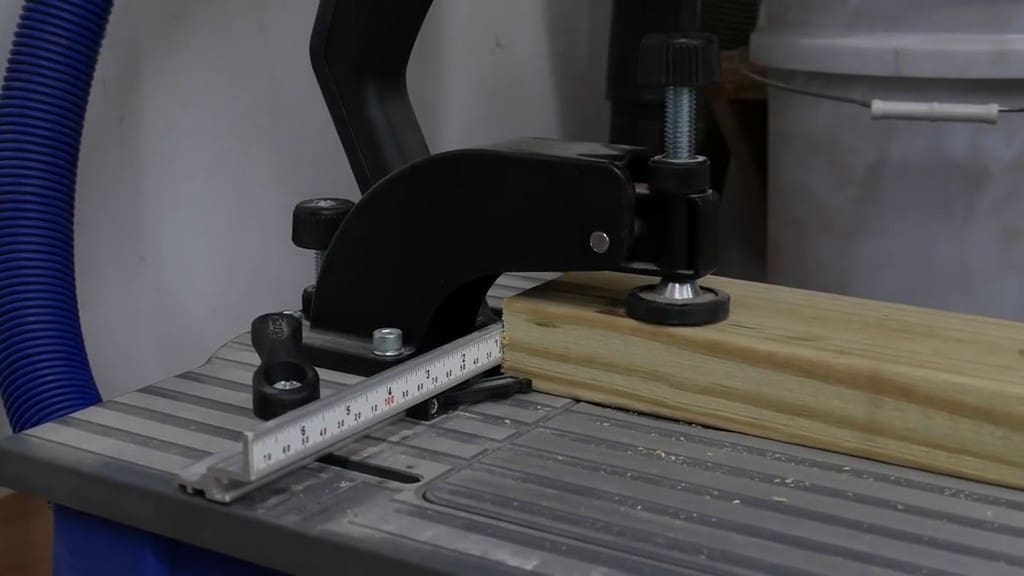
A miter saw is ideal for cutting these boards down to size.
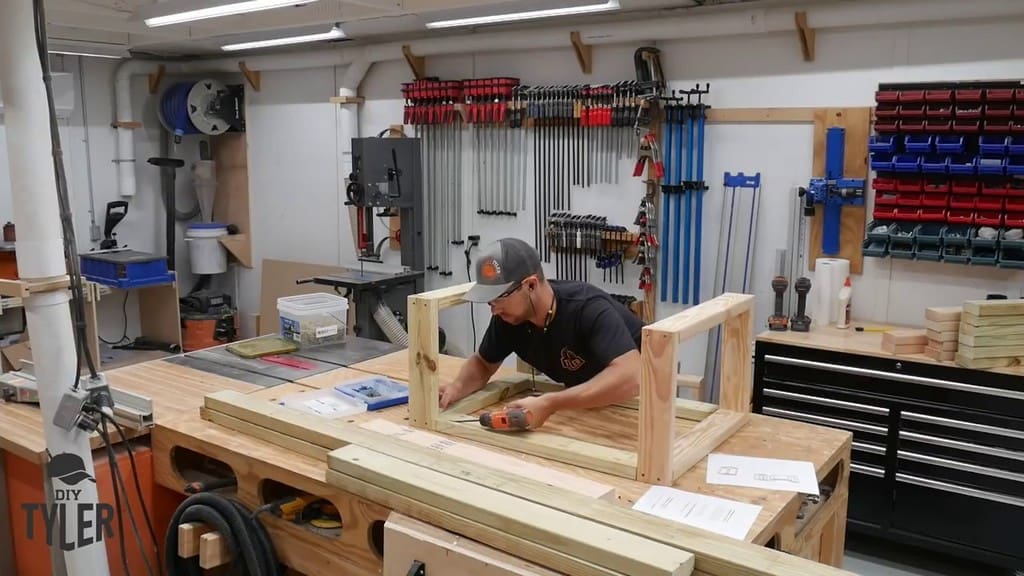
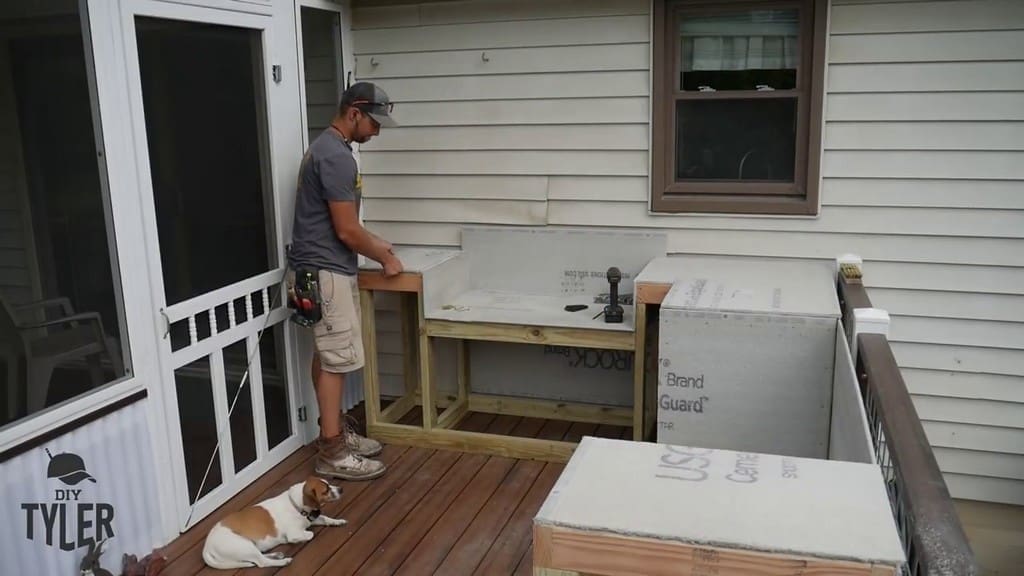
Each section of the outdoor kitchen consists of three parts. First, you have a box on the bottom, then you have a box on top. Finally, vertical supports join the two boxes together to complete the frame.
For joining the 2x4s to construct the frame, we used the Kreg Foreman tool, which made the job a whole lot quicker. It clamps and drills your pocket holes in one easy, smooth motion.
However, any pocket hole jig system, such as the Kreg R3 kit, will also do the trick. Just know that the process will take longer than if you use a single-step tool like the Foreman.
After you’ve drilled pocket holes into each of your boards, you can lay down pairs of vertical pieces on their sides in order to create the upper and lower boxes for the frames, as mentioned earlier.
We put everything together by drilling countersink holes into the boards with deck screws.
After assembling the upper and lower boxes, we used a pair of the boards with pocket holes in order to join the frame pieces together.
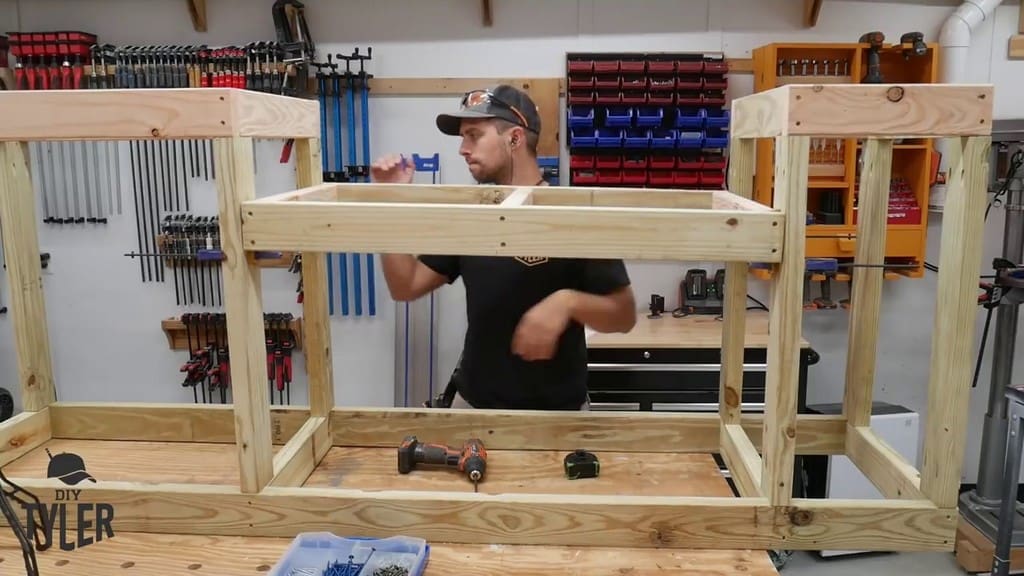
The photo above shows how this section of the deck kitchen comes together. The piece on the left is for a corner countertop, while the right-hand piece is a standalone section.
The box in the middle is set somewhat lower than the other two pieces. This creates space for the griddle. Note the neat trick of using clamps in order to hold the griddle’s frame piece just prior to drilling the wood into place.
Preparing the DIY Countertops
Next, we moved on from the frame to the countertops.
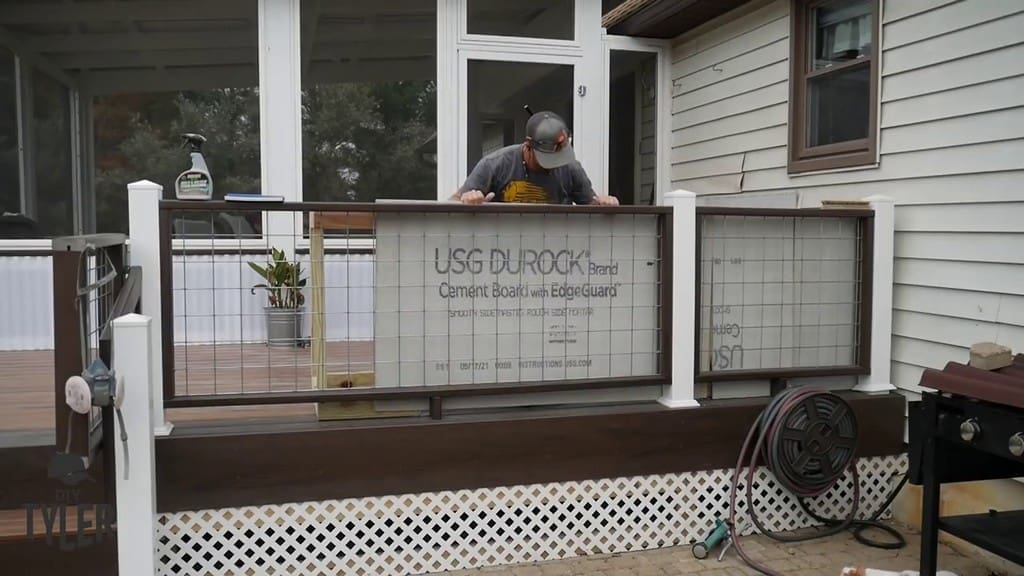
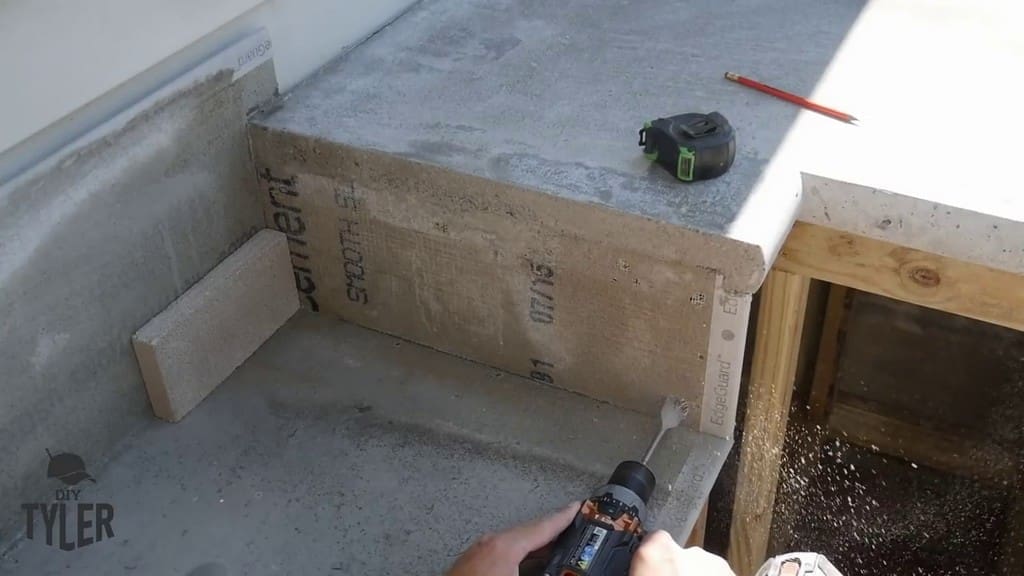
Since you want to avoid transferring any griddle heat into the wooden frame or the siding of the house, concrete board is the way to go for the countertop.
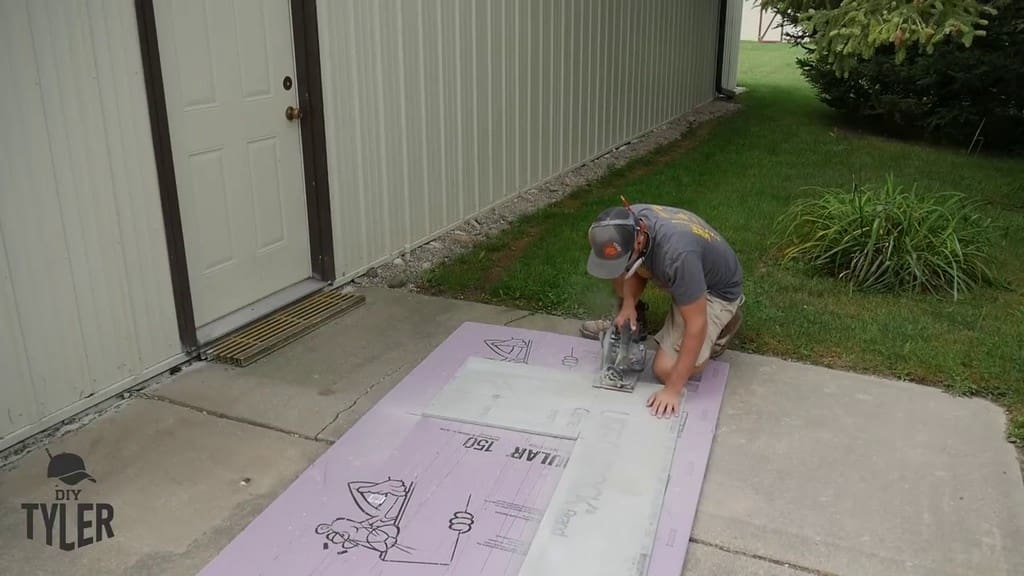
Cutting out pieces of concrete board with a circular saw is dusty—make sure to have a mask or respirator on hand!—but it does allow for a clean edge.
Measure out space for the griddle’s fire box using a steel square. You can also close in the back side of the griddle with an additional section of concrete board.
Make sure to leave a 1-inch overhand on the front of your griddle countertop piece. This will ensure that everything lines up nicely after you’ve installed the doors for the storage sections.
You can use a long piece of concrete board to provide backing for the pellet grill section.
1.25-inch deck screws are handy for fastening the cut concrete boards onto the top of your wooden frame pieces. Once these are fastened, you can move the frame into place on your deck and see how your DIY outdoor kitchen is coming together!
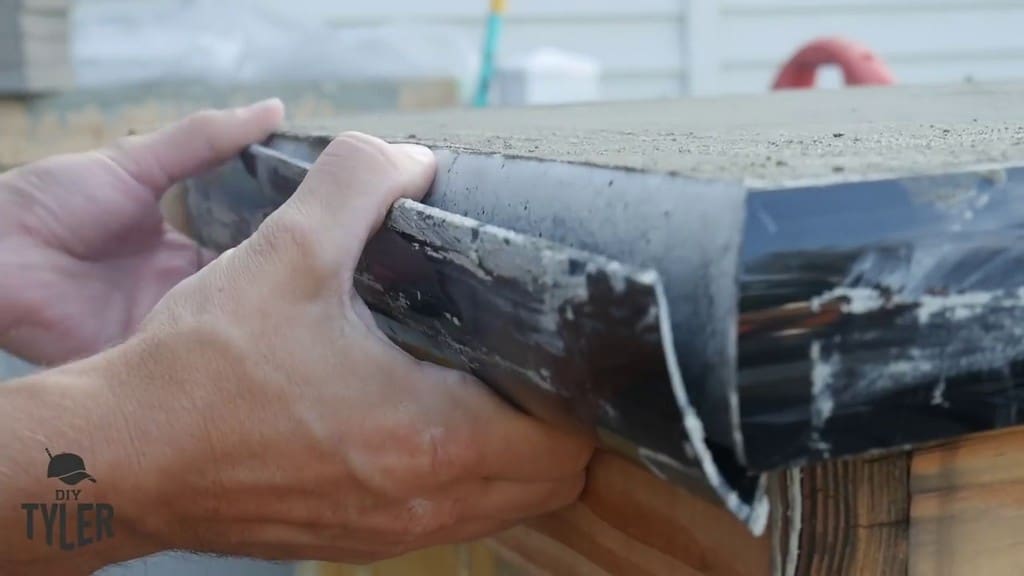
Pouring the Concrete Kitchen Countertops
To prepare the countertops for pouring, we recommend the Z Countertop Forms, which allow you to:
Cut to measure
Screw into place on your concrete board
Seal any holes with duct tape
Seal all seams with silicone caulking
Pour concrete on top
Snap bullnose section off and out of the way
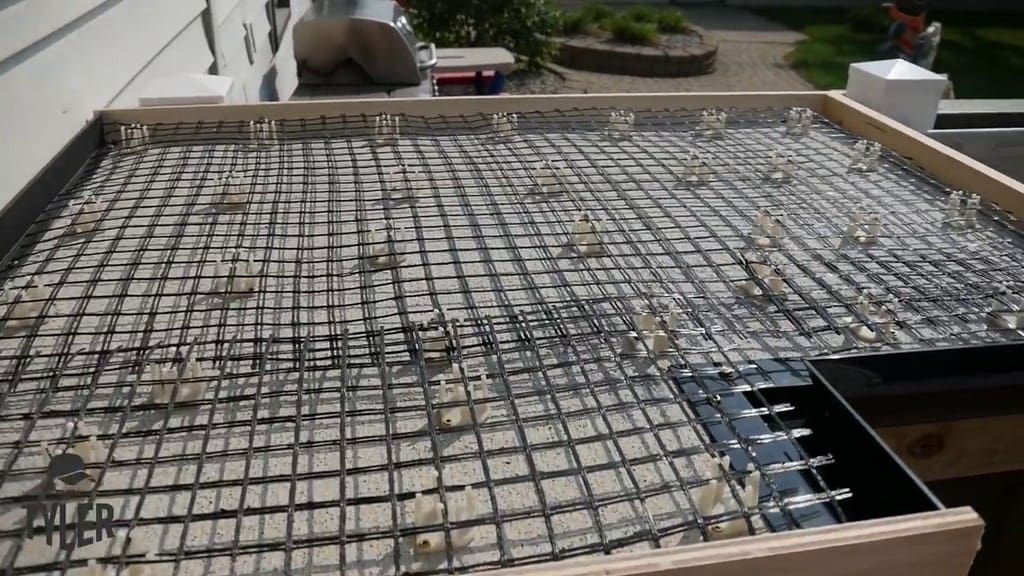
Z Countertop Forms also offer a fiberglass mesh, which you can cut to fit over your concrete board using a pair of side-cutting pliers. You can buy Z Countertop Forms clips to fasten to the boards using 5/8ths-inch outdoor deck screws.
Once fastened to these clips, the mesh will function like a sort of rebar in the middle of your concrete, preventing cracking over time.
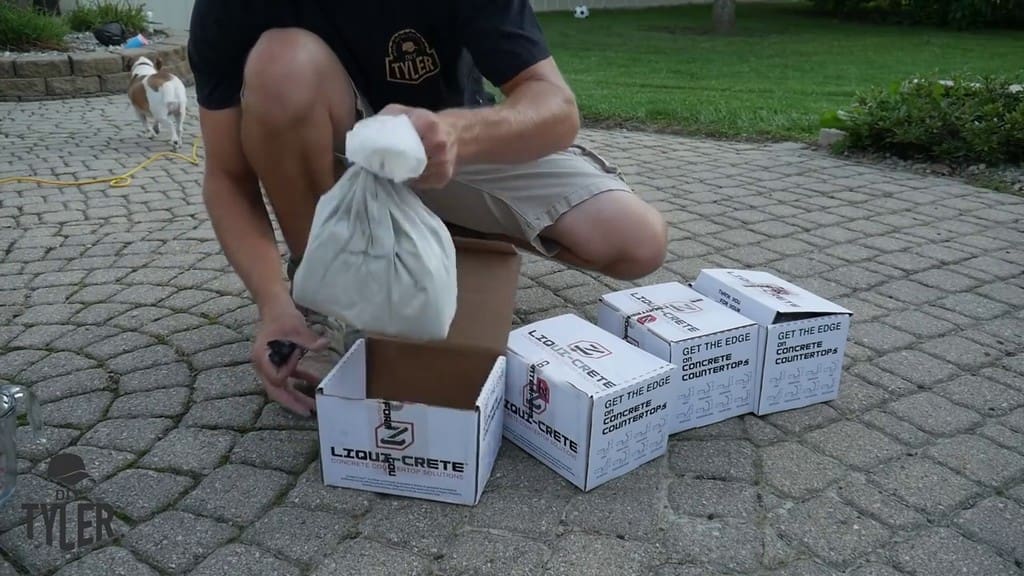
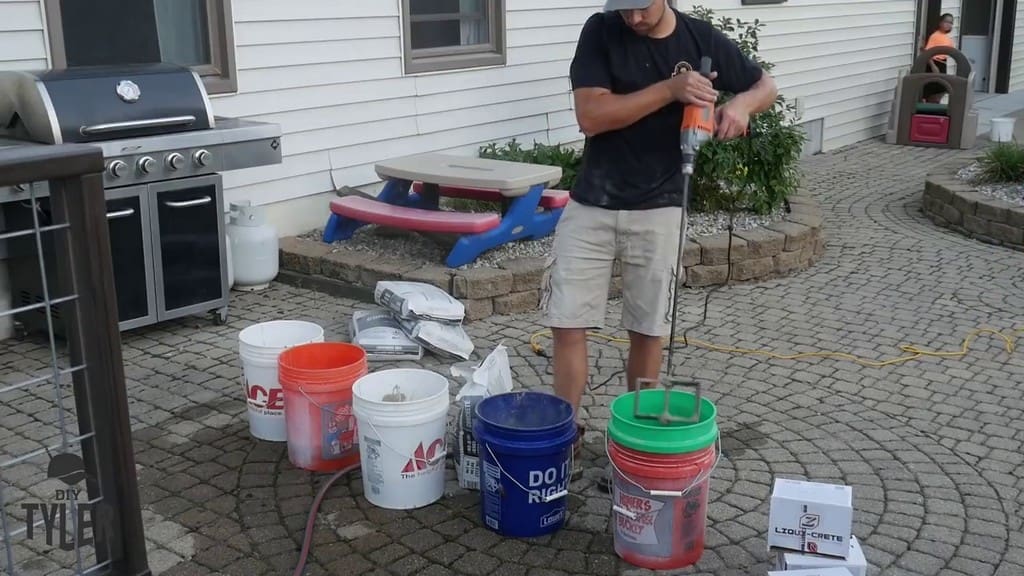
A concrete additive like Liqui-Crete will add fiber to your concrete mix, which will further reinforce against any future cracking. Add water to your bucket based on the formula listed on your bag of concrete additive.
Once the water has been mixed in with the additive, you can add the concrete mix itself. If possible, use a mixture with less aggregate. Having rocks that are too big can result in bubbles that will show up after the concrete has dried, which we experienced as seen below.
Next, we mixed up the concrete using a RIDGID drywall drill and a paddle mixer.
We did the math in advance to make sure that we would have enough concrete overall in order to do the job. The last thing we wanted was to mix up more concrete mix in the middle of pouring!
The company behind Z Countertop Forms offers some great instructional advice on pouring and smoothing out concrete. Follow their instructions to get consistent results.
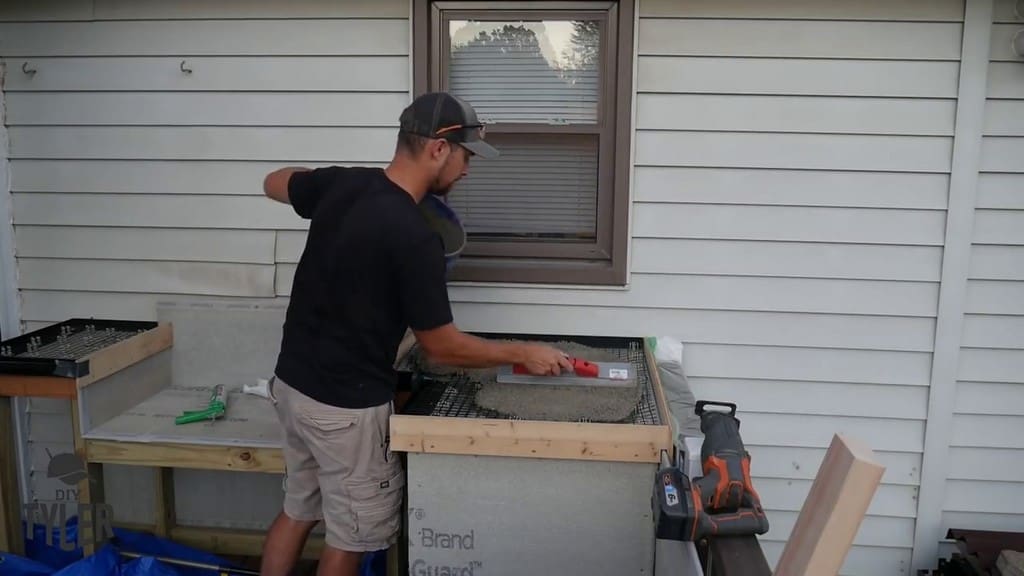
Finishing Up the DIY Concrete Countertops
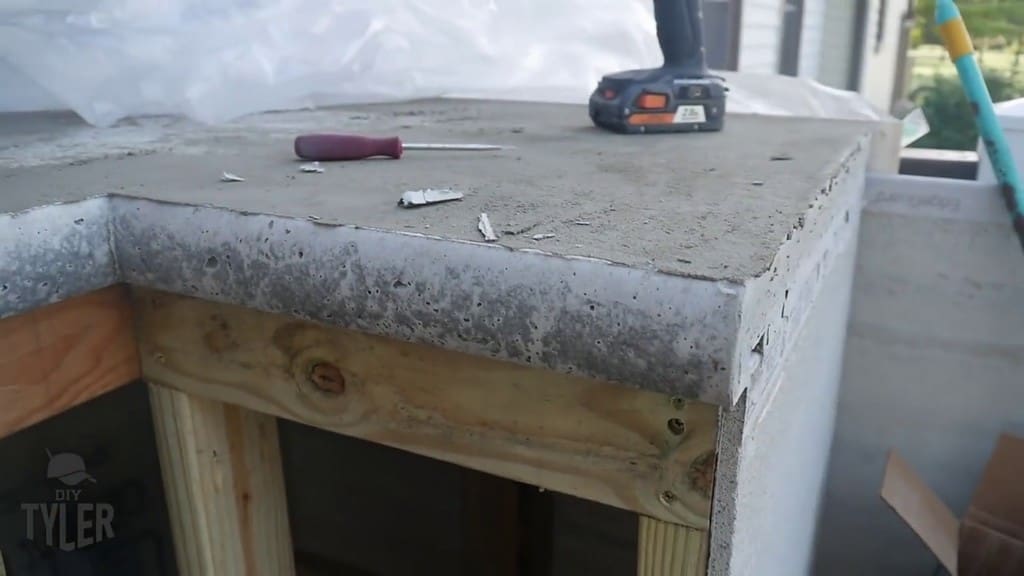
After removing any excess concrete, we used a magnesium trowel and a steel trowel to smooth everything over.
In order to patch the top of the counters, we used some vinyl patch concrete mixed with an adhesive bonding agent. If we were to do things over, we would skip this step and jump straight to polishing the concrete.
The Z Countertop Forms snap right off of the dried concrete, preserving your perfectly poured design.
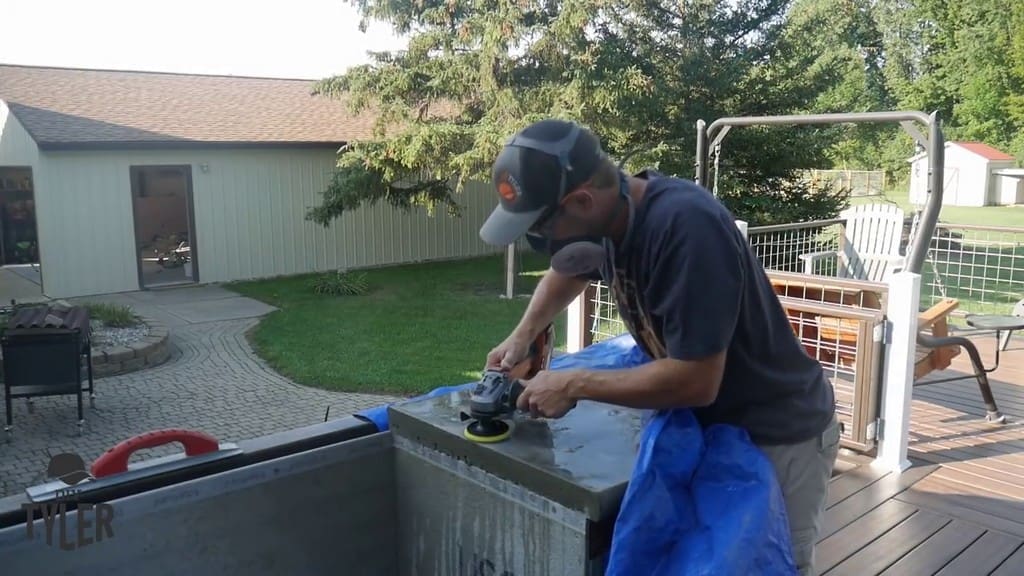
Still, there may be imperfections on top of the counters that you want to polish off. We used diamond disks to polish the countertop. A tarp and a hose came in handy to keep us from making too big of a mess!
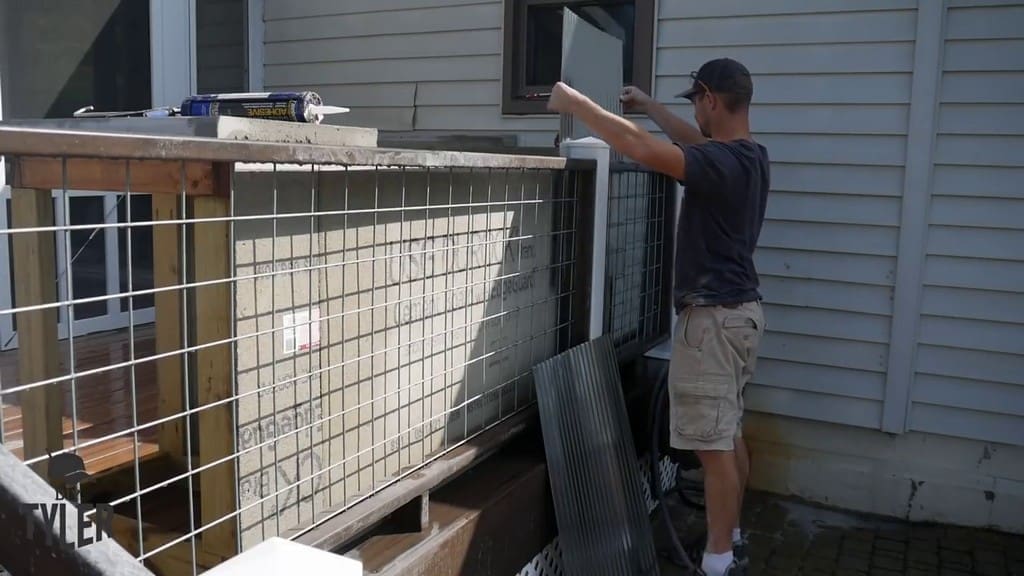
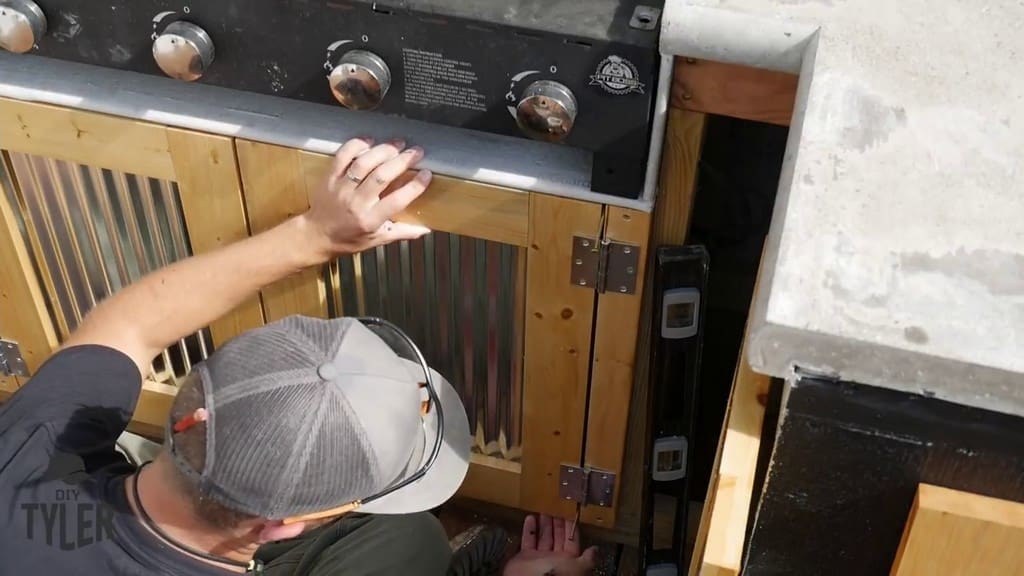
Next, we slid galvanized steel panels in between the back of the DIY outdoor kitchen frame and the deck railings.
Overlap the panels before screwing them together with quarter-inch screws. If you use self-tapping screws, you won’t have to pre-drill.
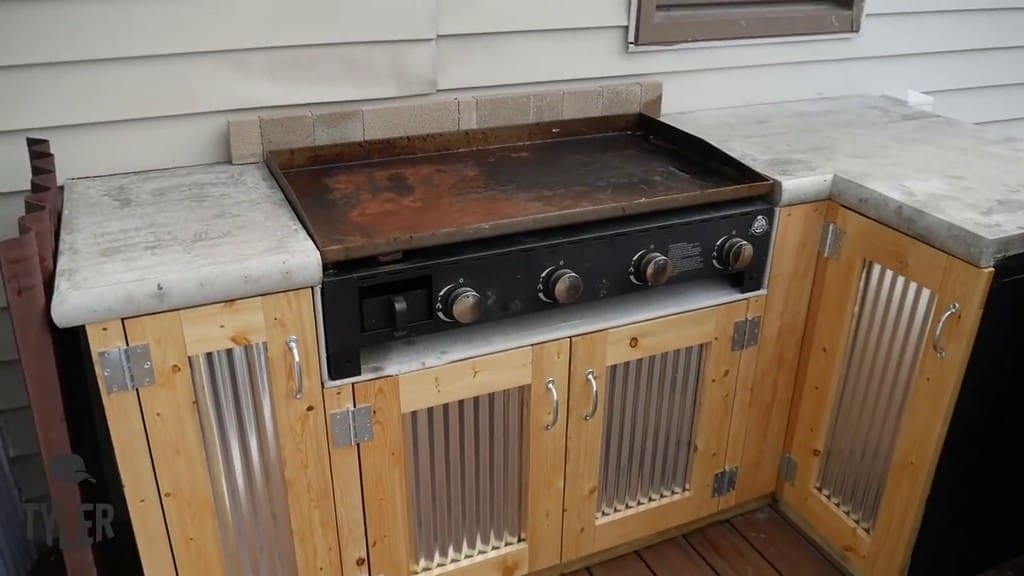
Installing the Outdoor Kitchen Griddle
Since our griddle area was directly next to the siding of the house, we added some fire bricks, which are intended for wood stoves and can handle up to 2,000 degrees. These bricks can be attached with mortar, but we instead opted for Titebond construction adhesive.
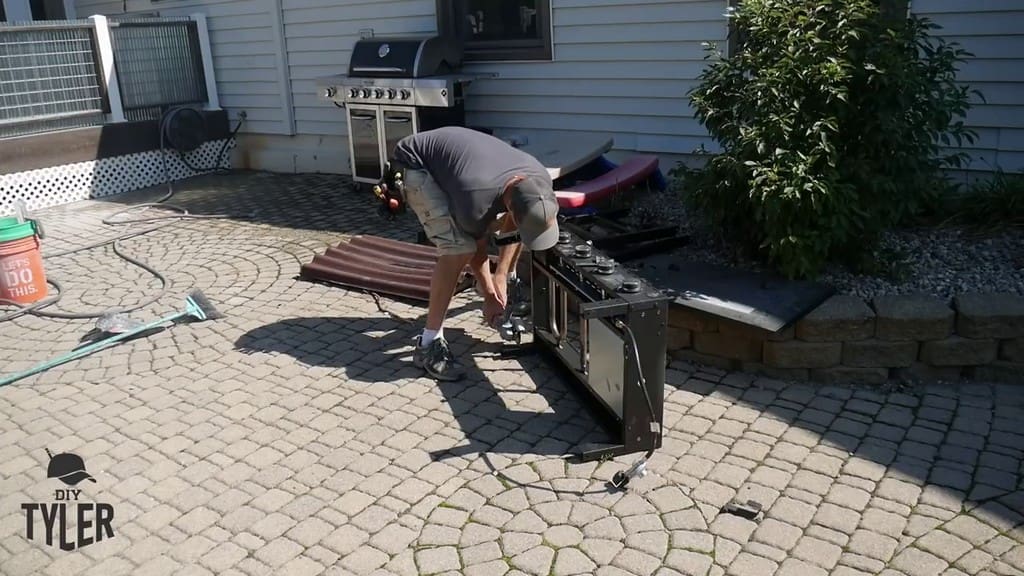
Our Pit Boss four-burner griddle was free-standing, so we had to remove the wings and cut off the legs in order to fit it onto our new DIY countertop.
The other necessary accommodation was creating a hole in our concrete side board for the griddle’s protruding gas line.
Building and Installing the DIY Doors
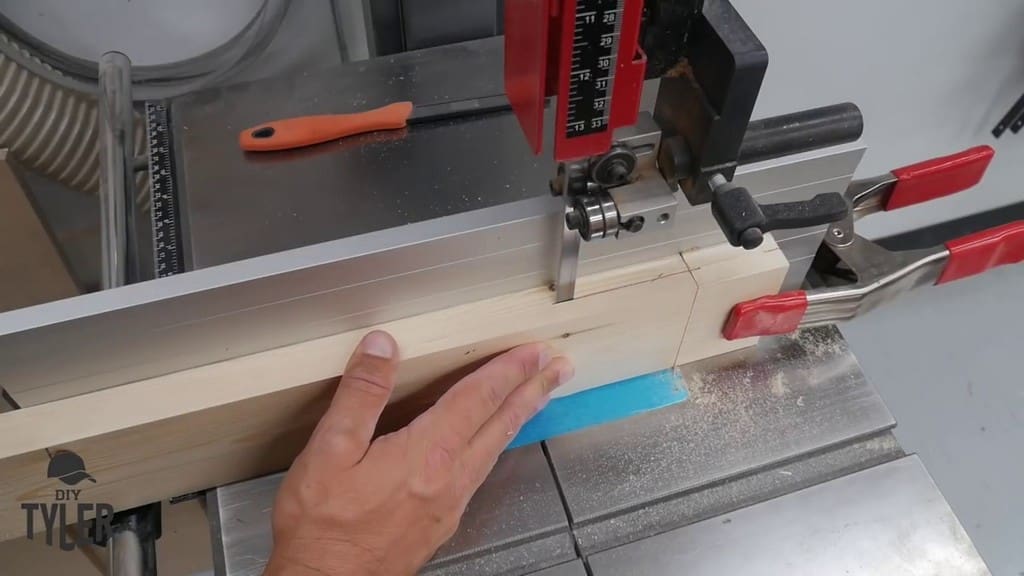
Having installed the griddle, we moved on to the doors for our storage space. When constructing the door frames, we used half-lap joints.
Half-lap joints allow total overlap of the board corners, so the measurements that we took from the deck kitchen matched exactly with what we needed to cut our boards to. We used a bandsaw to cut out the joints in the boards.
Once the joints were cut, we moved on to bonding.
The advantage of using Titebond construction adhesive instead of wood glue for the half-lap joints is that it doesn’t require perfect alignment between the two joint pieces. The Titebond adhesive will fill the gap and provide just as strong of a bond as wood glue.
After gluing and clamping all of the joints together, we varnished the doors with a matte finish.
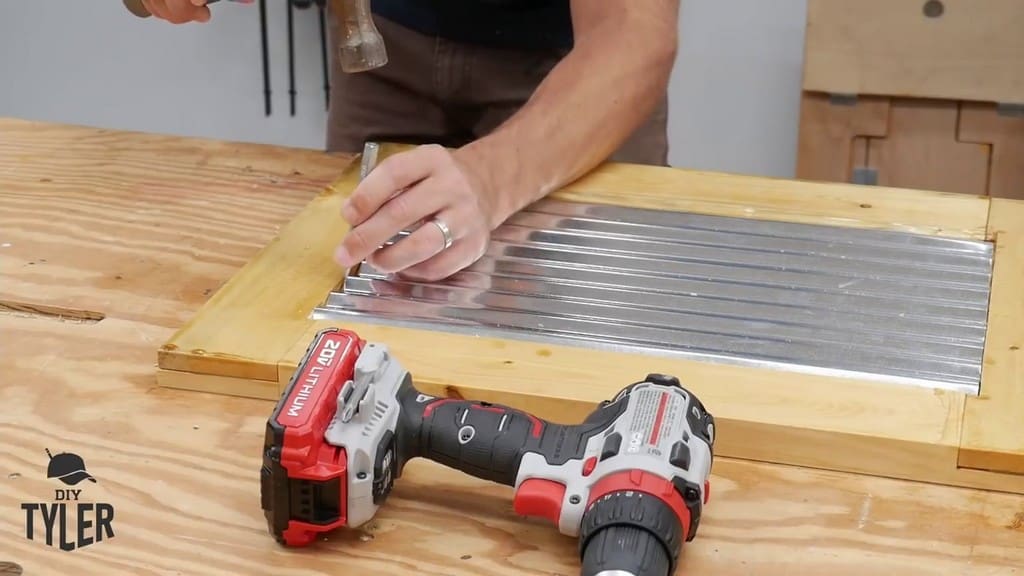
We then cut out pieces of galvanized steel and fitted them as paneling on the door frames.
Once the doors were assembled, we attached the hinges onto the deck kitchen frame and then drilled the hinges and the doors together.
While doing this, we used screws as spacers between the door and the frame. One screw was just above the top hinge, while the second screw was just below the bottom hinge.
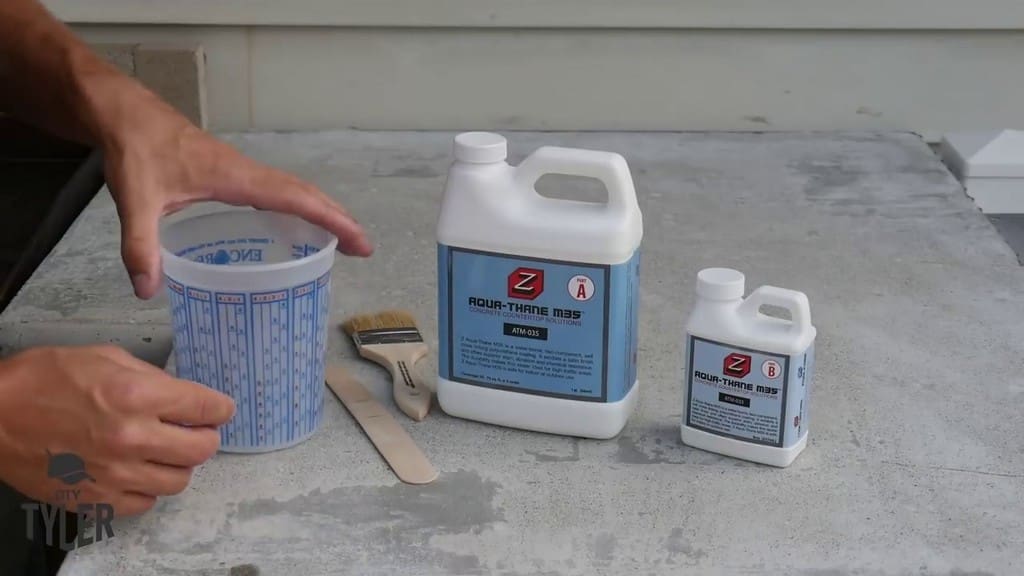
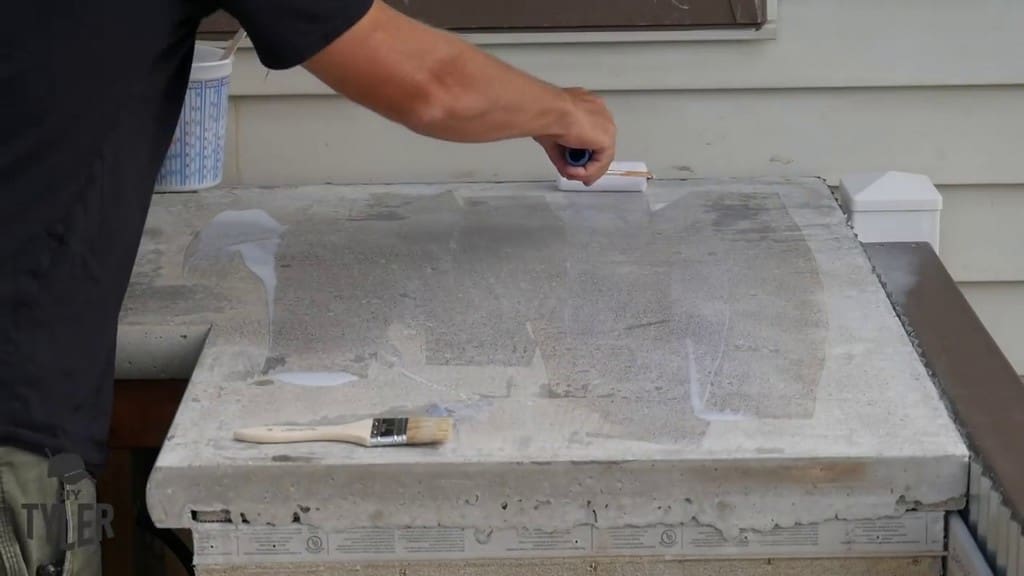
Applying the Finishing Touches
Now we moved on to the finishing touches. After brushing and wiping off the countertops, we applied two coats of a two-part polyurethane concrete coating within a four-hour timespan.
We mixed the liquids, drizzled it onto the countertop, and applied it evenly with a roller. A brush is handy for applying the solution to the sides and undersides of the concrete countertops.
Closing Thoughts
At the end of the day, this DIY outdoor kitchen set-up offers amazing options for preparing, grilling, and smoking meats, all located right outside your kitchen door!
Be sure to check out some of the tools I used in this build here!
I haven’t been able to find anywhere to calculate how much weight a deck will tolerates for something static like this as it wouldn’t even count the weight of people cruising by, looking for food! Do you have that anywhere?
Thanks!
To determine the maximum load capacity of your deck, start by calculating its total area and multiply by 50 psf. So, a 100 sqft deck would be designed to support 5000 lbs.
Do not get confused with what weight you might think or want to load the deck with.
If you drove a dump truck over it, yes this would throw all our calculations out the window. But we are building a deck to support known loads consistent with the purpose for which the structure is known to be used for and the 50 psf number has a safety factor in it. That is why engineers have settled on this as a safe value.
This is assuming the normal build material of 2″ x 8″ joist lumber 16″ o.c. We can go further into the specific tributary areas, but it’s not really necessary. That would break it down to show how each area can support the weight over each area. You’ll find the sum for weight capacity to be the same as the calculations above. This includes dead weight and live weig


5 thoughts on “DIY Outdoor Kitchen – Concrete Counters, Propane Griddle, Pellet Smoker!”
You nailed it !!
I am a big outdoor grilling fan !
Well done !! Thank you for sharing your project!!
I haven’t been able to find anywhere to calculate how much weight a deck will tolerates for something static like this as it wouldn’t even count the weight of people cruising by, looking for food! Do you have that anywhere?
Thanks!
To determine the maximum load capacity of your deck, start by calculating its total area and multiply by 50 psf. So, a 100 sqft deck would be designed to support 5000 lbs.
Do not get confused with what weight you might think or want to load the deck with.
If you drove a dump truck over it, yes this would throw all our calculations out the window. But we are building a deck to support known loads consistent with the purpose for which the structure is known to be used for and the 50 psf number has a safety factor in it. That is why engineers have settled on this as a safe value.
This is assuming the normal build material of 2″ x 8″ joist lumber 16″ o.c. We can go further into the specific tributary areas, but it’s not really necessary. That would break it down to show how each area can support the weight over each area. You’ll find the sum for weight capacity to be the same as the calculations above. This includes dead weight and live weig
Hopefully this helps you out!
Where can one get plans for this outdoor kitchen. Thanks great job
Do you have plans on this kitchen built