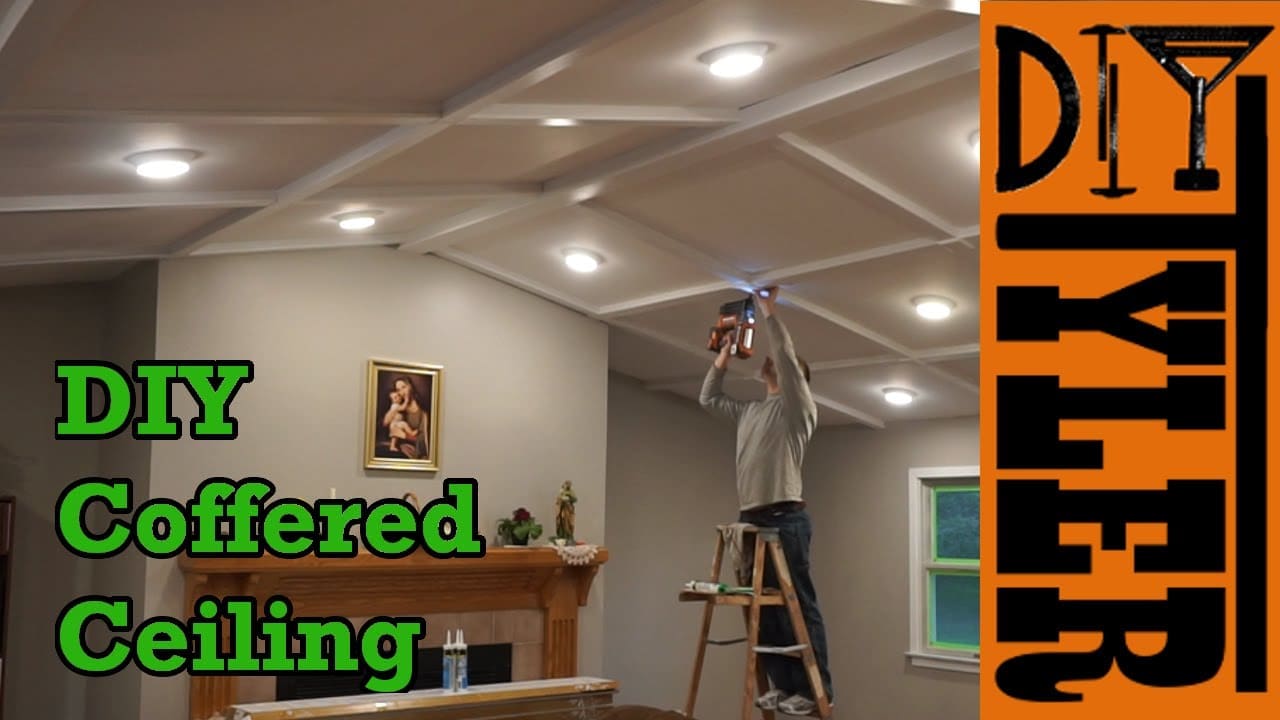
https://youtu.be/Hsjcy91uqKMOur great room has been let with only 3 lights since we moved it and it’s a big room so it was always very dark, we finally changed that! We have recently remodeled the great room and one of the biggest changes was the addition of a coffered ceiling. The reason for the coffered ceiling is two fold; one it covers the aging drywall seams without be having to do a ton of overhead sheetrock work, two it acts as a conduit for the ramax supplying the new lights in the room.
Coffered Ceiling Construction
All the coffered ceiling beams are made from 1/2″ MDF constructed in a U shape that is mounted on the ceiling with 2 1/2″ screws and fender washers. The total cost of the upgrade was about $200.
The coffers are assembled from 4 different parts, I began by cutting all the parts to proper width using the table saw. (2 Stage dust collection system worked GREAT!)

Here you can see how the beams are assembled, three parts make up a “U” shape and after the beam is installed on the ceiling we came back and added the cap….shown on the right in the picture below.

The cap overhangs the beam a 1/4″ on each side negating the need for any caulk on the beam itself, besides the nail holes anyway.

To assemble the beams I used wood glue and 1″ 18G brad nails. I assembled a few using 23g pin nails and at first thought it didn’t pull the sides together enough but after painting everything I would definitely use the 23g nails for the “U” assembly as they made the painting process much simpler.

[wp_ad_camp_1]
To make sure the beam was assembled without any ridges I made sure to pinch the base and sides together before shooting the nail.

In total there were 25 small beams and 3 large beams, large beams are for the center-line of the room.

Didn’t spend too much time sanding the beams but I did take the some sanding the coffer caps as they have a exposed MDF edge that I didn’t want raising too much when painting.

Painting Coffer Beams
To finish the coffered ceiling beams I first primed them with Kilz 2. Priming and painting these beams was a huge pain in the neck, literally. I first tried to use my compressor and HVLP gun but it was REALLY slow and the compressor ran so much it let water in the line despite my water filter. I than rolled the caps and beams, that worked but was slow and awkward to hold and roll at the same time. Finally found success with a dedicated spray system that HomeRight hooked me up with, it worked excellent and I will be using this TON in the future.

After two coats of primer and sanding in between it was time for the final coat and we cost to use Behr high gloss white and we couldn’t be happier.

We also sprayed the final coat.

Installing the Coffered Ceiling
To install the beams we first measured from both sides of the room to establish the exact center.

For the center beam we drilled two holes every 24″ (Our truss distance) on an angle away from eachother so we would not be shooting a screw into the weak butt joint of the truss. I drilled and counter sunk the holes from the back of the beam to prevent any blowout from allowing the beam to sit flush against the ceiling.

We used 2 1/2″ star drive screws with a large fender washer to install the beams on the ceiling.

Installing the center-line beam.

After the center beam was installed we cut the smaller beams to the length we wanted and drilled the mounting holes.

Measured the placement so that each of the beams would land under a ceiling truss. The distance between each beam is 48″.

And screwed them into place, 4 screws per 48″ beam.

And a shot after all the beams were installed but no caps yet.

To install the caps we used a little bit of wood glue and 1 1/4″ brad nails.
 Once all the caps were on I installed a small square over each of the joints to cover any gaps.

And caulked to my heart’s content. Caulked around the joint squares and against the ceiling to give a uniform look.

Conclusion

We absolutely LOVE how this project turned out. If I was to do it again I would definitely use pin nails to assemble as it gave a smoother final finish to the beams and I would spend a little more time sanding before painting to give a smoother surface, especially on any edges.
Thanks for checking out our stuff and if you have any questions or comments be sure to let me know!
Please follow and like us:
2 thoughts on “DIY Coffered Ceiling Build”
Hello love the video and have decided to take on my own project with the vaulted Crawford ceiling. Question were your squares 48in by 48in ?? I’m having same issues with drywall seams and it looks to me we have pretty similar layout in our room as your video if not exact. Thanks again and appreciate your help and video
Work looks great and thank you. But you never explained how you did the electrical for the lighting.