
Ever head out the door and forget your car keys? We’ve been doing it a lot since putting on our addition, as the keys remained in the drawer of the wireless charging station located in the kitchen. Which means….shoes back off, dash through the house, and grab them when we’re already running behind. It was time to add a proper key rack to our new mudroom space, one that would have plenty of key hooks but also a drawer for those little items that are often needed near the door. (Mail that needs to be sent out, the thing you were going to bring over to a neighbor, etc)
We went with something personalized and unique, using walnut to monogram the initial of our last name into the lower peninsula of Michigan, where we live. Sorry, dear friends of the U.P. You just didn’t make the cut this time.

Step 1 : Preparing the stock
As with many of my projects, I began this one over at my mitr saw station, where I enjoy great dust collection and a good stop block mechanism for repeatable cuts. This is my preferred method of breaking down lumber to rough length. Today I will be using maple for the Michigan handprint and drawer, and a little bit of black walnut for the monogrammed inlay.
The bandsaw was used to rip my newly cut boards in half widthwise to allow for maximum usage of our wood. An easy way to make sure you have the exact center of the piece is to cut it, flip it vertically, and make sure your blade is directly over the cut you just made. If not, you can adjust the fence a little bit as needed, and make sure that you’re right in the middle.
Since the stock was pretty squared up naturally, I was able to skip jointing completely and go right to the planer to make sure everything was parallel.

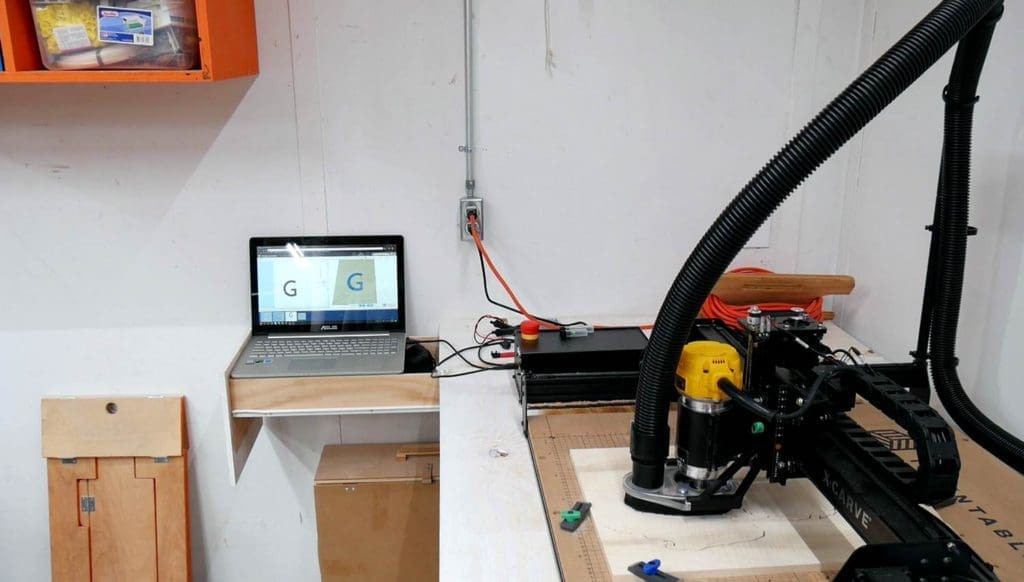
Step 2: CNC or scroll saw work
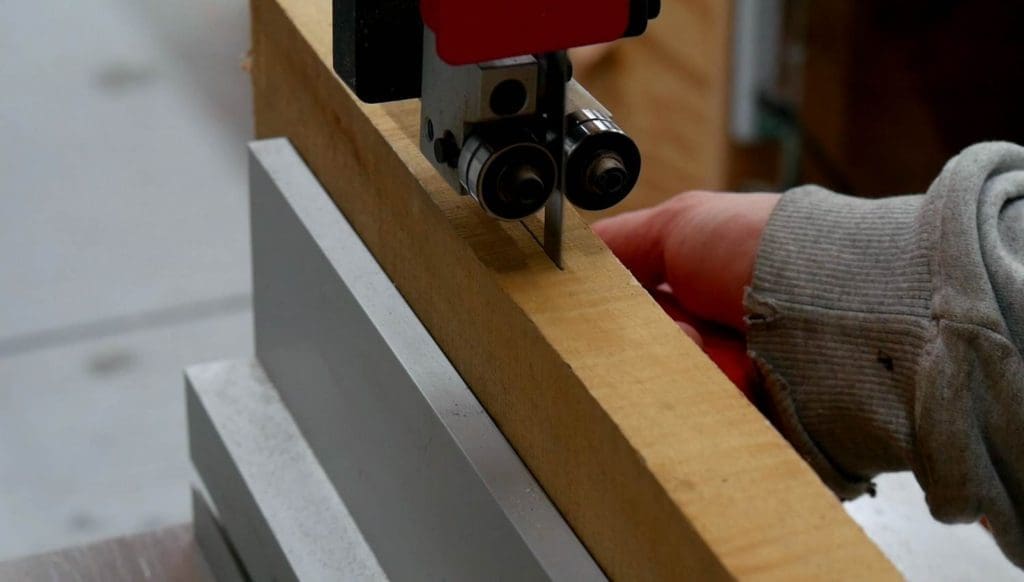
I glued two of these boards together for use on the X-carve, which is how I chose to make the state’s shape and do the monogramming. A scroll saw would work well too. It’s a bit intricate for a jig saw, except for those of you who live in, say, North Dakota or Kansas. If all else fails, make friends with someone who owns an X-carve and bring something adult to drink while the machine does it’s work. I started mine up and continued to work on the rest of the project.

Once the CNC had finished I carefully popped the “G” out of the walnut with a chisel, and ran it past the router to remove the tabs. Then it was glue into the inset area of the maple, and gently tapping our initial into place for a perfect fit. A few clamps offered assurance that nothing would crawl out of place.


Step 3: The Drawer and shelf
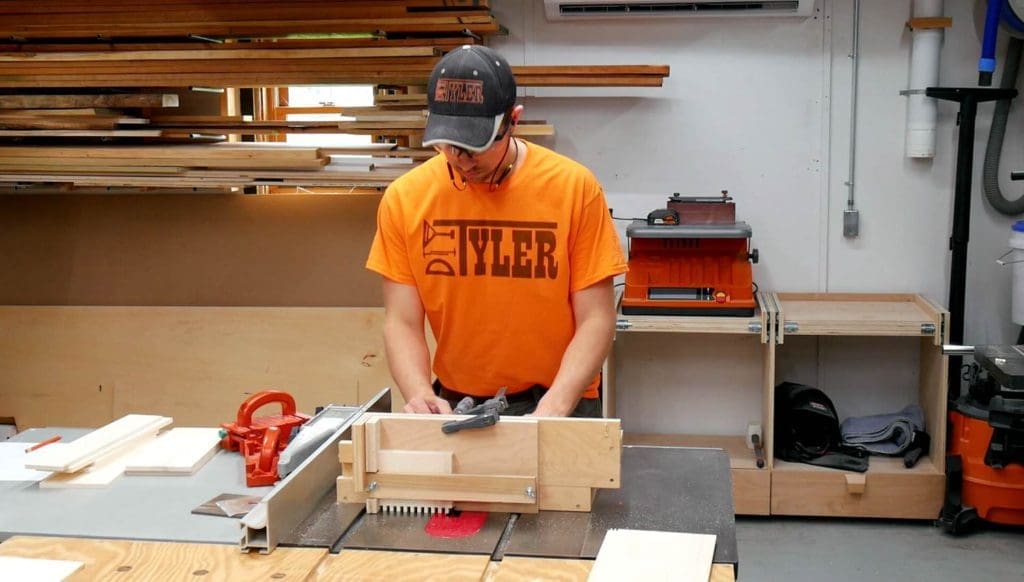
Drawer time! Regardless of how we say it, this shelf and drawer is a rectangular box made with box joints cut on the table saw, using my John Heisz designed box joint jig and secured together with glue. I have a video out with this method, (HERE) if you would like more information on this process.

While everything was drying up, I measured out some half inch plywood to use for joining both creations together and to act as a back for the whole project, offering a 3 dimensional look when placed on the wall. I used the band saw and router for this since it did not need to have the detailed edges, which I chamfered anyway for a finished look.

Step 4: The Assembly and finish
The final assembly was made with wood glue and fast acting CA glue so clamping would not be necessary on the finished piece.


A quick sand down was in order, the final grit being 220. We chose General Finishes Enduro Var for the finish and I decided to spray it since there was a couple of other small projects that were calling for finish as well. Sometimes I think, not worth it to wash the sprayer up, but afterward it has always, ALWAYS been worth it, and I cannot recommend my Fuji Q5 Platinum Sprayer enough. I’m not even being paid to say this, folks. I just believe in it.


Adding a little bit of hardware was our last step to completion. We used a satin nickel pull for the drawer and double hangers on the back for placing on the wall. I finished the project by adding 6 half inch eye hooks on the underside of the drawer to hang up our vehicle and tractor keys. These little guys were the whole point of the project, and I almost forgot about them!

Conclusion
It has been very nice having this little piece of practical Art in our mudroom, and we are very happy to have it right there by the door. It’s the last thing we use when we leave, and the first thing we use when we come back home. Perhaps it’s time to make one for yourself?


Please follow and like us:
3 thoughts on “Monogrammed Key Rack|with Drawer”
Do you sell these? We love it!
I am I love with your videos! My husband & I are just starting to build We love the Murphy bed!but can’t seem to find your plans?
I’ll keep looking! Thank You
Found the Murphy bed plans& am ordering can’t wait tomake my guest bedroom in my new recriminations the basement♥️♥️