With the structure of the deck now finished it was time to bring in the big guns and put on the decking! Put in a call to my brothers to come down and help and boy did they lend a big hand. In one day we were able to get all the deck installed and some parts of the railing up as well.
The brothers, 4 of them, came down on Friday evening so we could get an early start on Saturday. That evening we spent some time putting in two posts, not into the ground, for the staircase and screwing off all the joist and hurricane brackets. (Pictures can be seen in the last article.) Would have been nice to have one or two more drills but the 4 that we had did okay! My wife does not understand why I think we need more.
Had a few odd cuts to make to get around the post start the first deck board but after that it was pretty much straight running. We would put several boards across the joist, drill and countersink the ends, slid into place and three of the brothers would screw down as I pinched the board tight with a crowbar using the ground as a fulcrum. Repeat again and again….
Am so pleased that we decided to go with single 16′ boards, no cutting, no joints to warp up later on and it went really fast.
After the decking was installed we decided it would be a good idea to replace the door going into the house while we still had the help. Had to replace a bit of rotted wood along the bottom of the door but otherwise it was a simple change.
Had to hand power plane the screen door to make room for the hinges. Took off about 3/16″ in seconds…..love tools!
For the railing installation the first matter of business was to cut the post down to the proper height. We measured up from the deck and cut with two passes of the circular saw. Lattice post were left alone until we had railing to stand on.
Then cut 2x4s to the proper length and installed the top rail level with the top of the post and the bottom rail 4″ up from the deck. After the rails were in place I made a jig that was 3.75″ wide that allowed me to space the pickets evenly and quickly. Took a evening to complete the railing.
We started the staircase by putting in the last two posts in the ground using the same method we followed for the other posts. We waited to put these last two post it to make sure we could accommodate any error in the railing. Risers were cut using a template I made from the sketchup file.
Put the railing on the stairs, some tricky cuts here but measuring three times made for one cut….doesn’t always happen that way. After the railing was on the stairs we capped off all the railing using a 5/4 deck board. This really added a nice finishing touch to the railing.
We then cut the lattice post to height at this point using one pass of the circular saw and finishing off the rest with a hand saw. Used this method so that the 4×4 leftovers would knock be off the railing while I stood on it to reach the top.
To install the lattice my thought was to pinch it in place between two small boards. I cut these out of some scrap 5/4 deck boards and routed a roundover so keep everything consistent.
Cut the lattice to size using the circular saw.
Put one side of my “pincher” boards in place, put the lattice up and then installed the other side of the pincher boards. Lattice seems to be pretty sturdy so we will see how it holds up to the weather. Have never been a fan of lattice since it seems to destroy itself over time but I think that the “pincher” method will keep it looking pretty suitable.
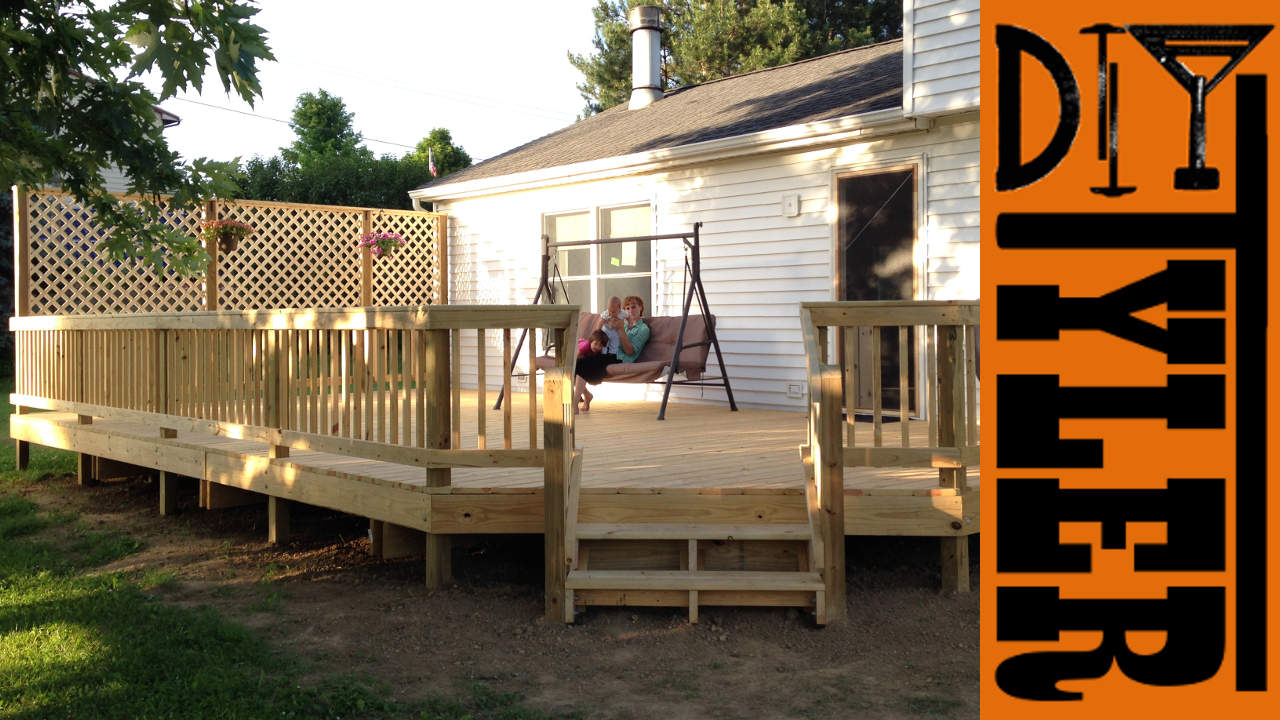
And the finished deck!!! Minus the skirting……
We spent a Saturday putting the skirting around the bottom. Used fence boards cut to 16″ with dog ears on the top. Snapped a chalk line so that we were consistent across the top of the boards and scrapped away some dirt to cover the bottom. Screwed in place using 1 5/8″ deck screws….tried to save some money by only using two screws diagonal to each other for each board, will see how it turns out, will probably have to screw down more in a few months.
My wife says the deck is done and I suppose the gate across the stairway is not important. Done it is! Deck party coming up…..
Below are a few shots from the same angle showing the progress from start to finish.
Thanks for looking and see you next time!
Please follow and like us:


