**Update 2015, I built a second one of these for my Godson, video below.**
With the birth of our son, Ethan, in January we were confronted with a third party in our bed again, and one that takes up all the space on top of that! My wife stumbled across a small three-sided crib called a co-sleeper that seemed like the PERFECT solution. $500 is what it cost and thus my newest project was brought to light. We were able to find a mattress from Amazon, HERE, and worked on a design together to build around the mattress.
Wanted to make sure the crib mattress would stay snug up against our mattress, and other mattress levels, which made the design of the legs a little tricky. Below is the design we came up with.

We decided that we would build out of regular pine lumber and thickness plane to more “delicate” dimensions and squareness. Joinery would be completed with dowels and a few screws for final assembly.
Below is the materials list and cost for the lumber in my location.
***Design change about half way through the project, the below list is for co-sleeper 2.0***

Seraphina and I made our trip to Lowes (Woes, as Sera calls it) and came home with the below stack of lumber. I like to clamp together whatever lumber I can hoping to prevent warping, don’t know if it helps but it makes me feel better.

Printed out the plans, several parts 1:1 scale, and got to work planing the legs, side rails and support rails to proper dimensions and cutting to length.
Process for making the curvy front legs.
After making the front legs and not really coming out with a satisfactory result after planing it was time for some changes. The hand power planer blade was not wide enough to make a nice cut on the curved leg and the side rail connected right at the curved point which didn’t come out very well either.
Changed the design a bit to the picture below and in the end it worked out great! All along I wanted to make the process quicker in case I build one of these sleepers for someone else and this took a lot of time out of making the frame. Basically removes the curve cut and replaces it with several straight pieces, this allow for simple joints too.

Also came across a decently priced thickness planer off craigslist right about this point. Used that to plane the the new designed pieces to thickness.

Turns out a much better board than the hand planer
|

Will need to make a dust collection hood. Someday this planer will be turned into a jointer.
|
After the design adjustments it was time to make the top rails.
Cut the stiles to width on the table saw and sanded with the belt sander jig.

|

|
Cut a ~1/8″ thick strip of wood to insert into the dado between each stile, preventing the need for dowels in the top rail. Cut to length with the table saw sled.

|

|

|
Made a self-centering dowel jig, more on that in another article, and proceeded to drill dowel holes.

Used calipers to mark the location for the long back rail. Dowel jig has a set point for short pieces negating the need to mark anything.
|

Clamp the jig in place to drill. Only used one of the guide holes for the long rails.
|

|
Dry fit of one of the sides.

Gluing up the side panels.
Glue up of back panel. Need to get some pipe clamps. Actually saw some homemade parallel clamps online and think I may give them a try.

Dry fit of the crib.

Gluing the dividers between the stiles. The stiles were still movable at this point, after gluing the dividers in place they were solid.
Cut the mattress board to dimensions with the table saw and glued/nailed support boards on the bottom in a torsion table like design.

|

|
Sanded each part to 220 grit with the random orbit sander, cleaned up and then stained using English Chestnut Minwax Stain. Took three trips to HD and Lowes to get a color that was close to our current bedroom set.

|

|
Finished with two coats of my absolute favorite polyurethane. Was really pleased to see that during the two days that the sleeper sat with the stain drying it seems to darken quite nicely….it turned out to probably be the most perfect color match you will ever see with out bedroom set!

|

|
Assembled using 4 wood screws on each side. Also, opted not to put the front support rail on….mostly because I forgot to make it but we also didn’t think it was totally necessary and it makes it harder to take apart.
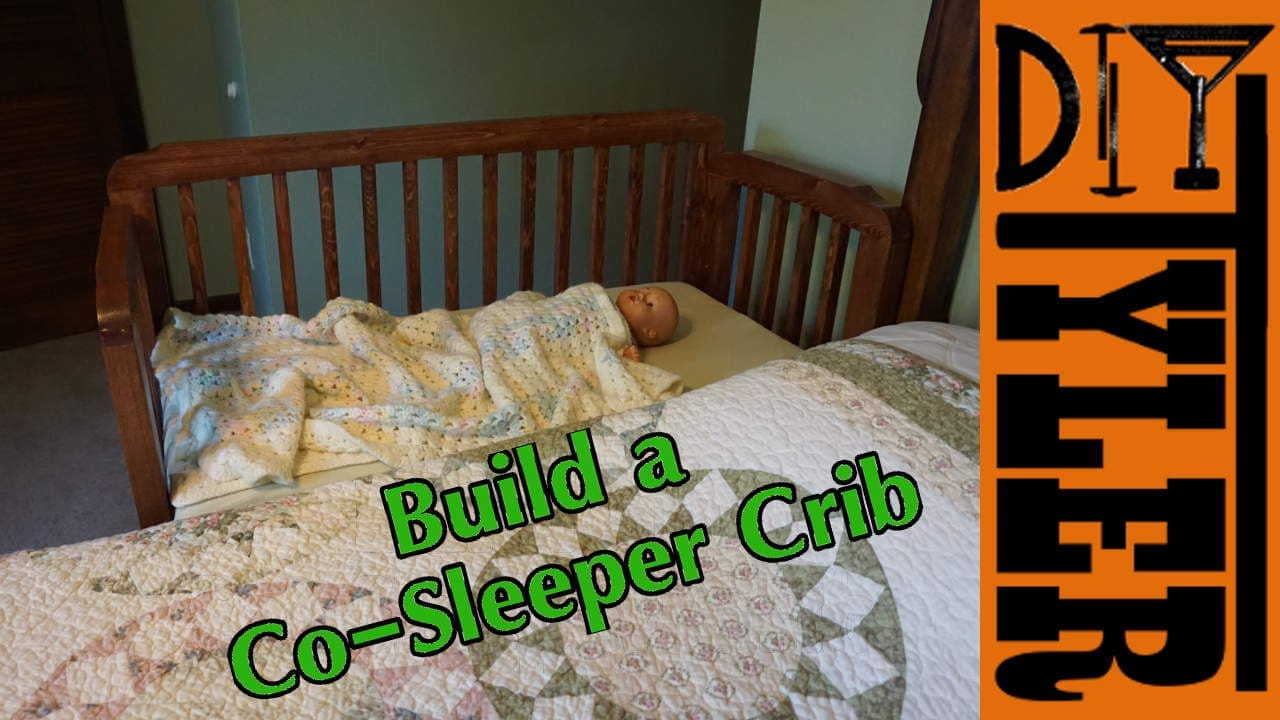
Couldn’t have asked for a better final result! There are two mistakes that are super minor and I won’t tell because my wife hasn’t found them yet (both are pictured in this article). It did take me quite a while to complete but I never worked on it for more then an hour or so at a time. Can’t really think of any way to make it a shorter process for possible future builds. Having a thickness planer and a dowel jig on hand will help cut time down, a jointer will also make the lumber prep process much faster.
Please follow and like us:
3 thoughts on “Co-Sleeper”
Would love,to get a,set of plans for this. My youngest Daughter is having her first baby in September. Appreciate if you could post a printable set of plans. Thank you!
Do you have a cut sheet and plans for this build? I love the design but I am a novice and can’t figure out how long to cut everything.
i would love to get this plans for the cosleeper you show on your utube video thank you dennis stewart